Branching Form Option
“Branching” is a Quality Management (QM) feature that has a configurable flow, with optional questions that only show up if specified answers are selected. It is also possible to link an option (i.e., “dropdown” question type) with the previous answer.
Note: At the moment, you can only add branching options to the “Radio buttons” question type.
Adding Branching Options
While building or editing a form, you have the opportunity to add branching. To do so, please follow the steps below:
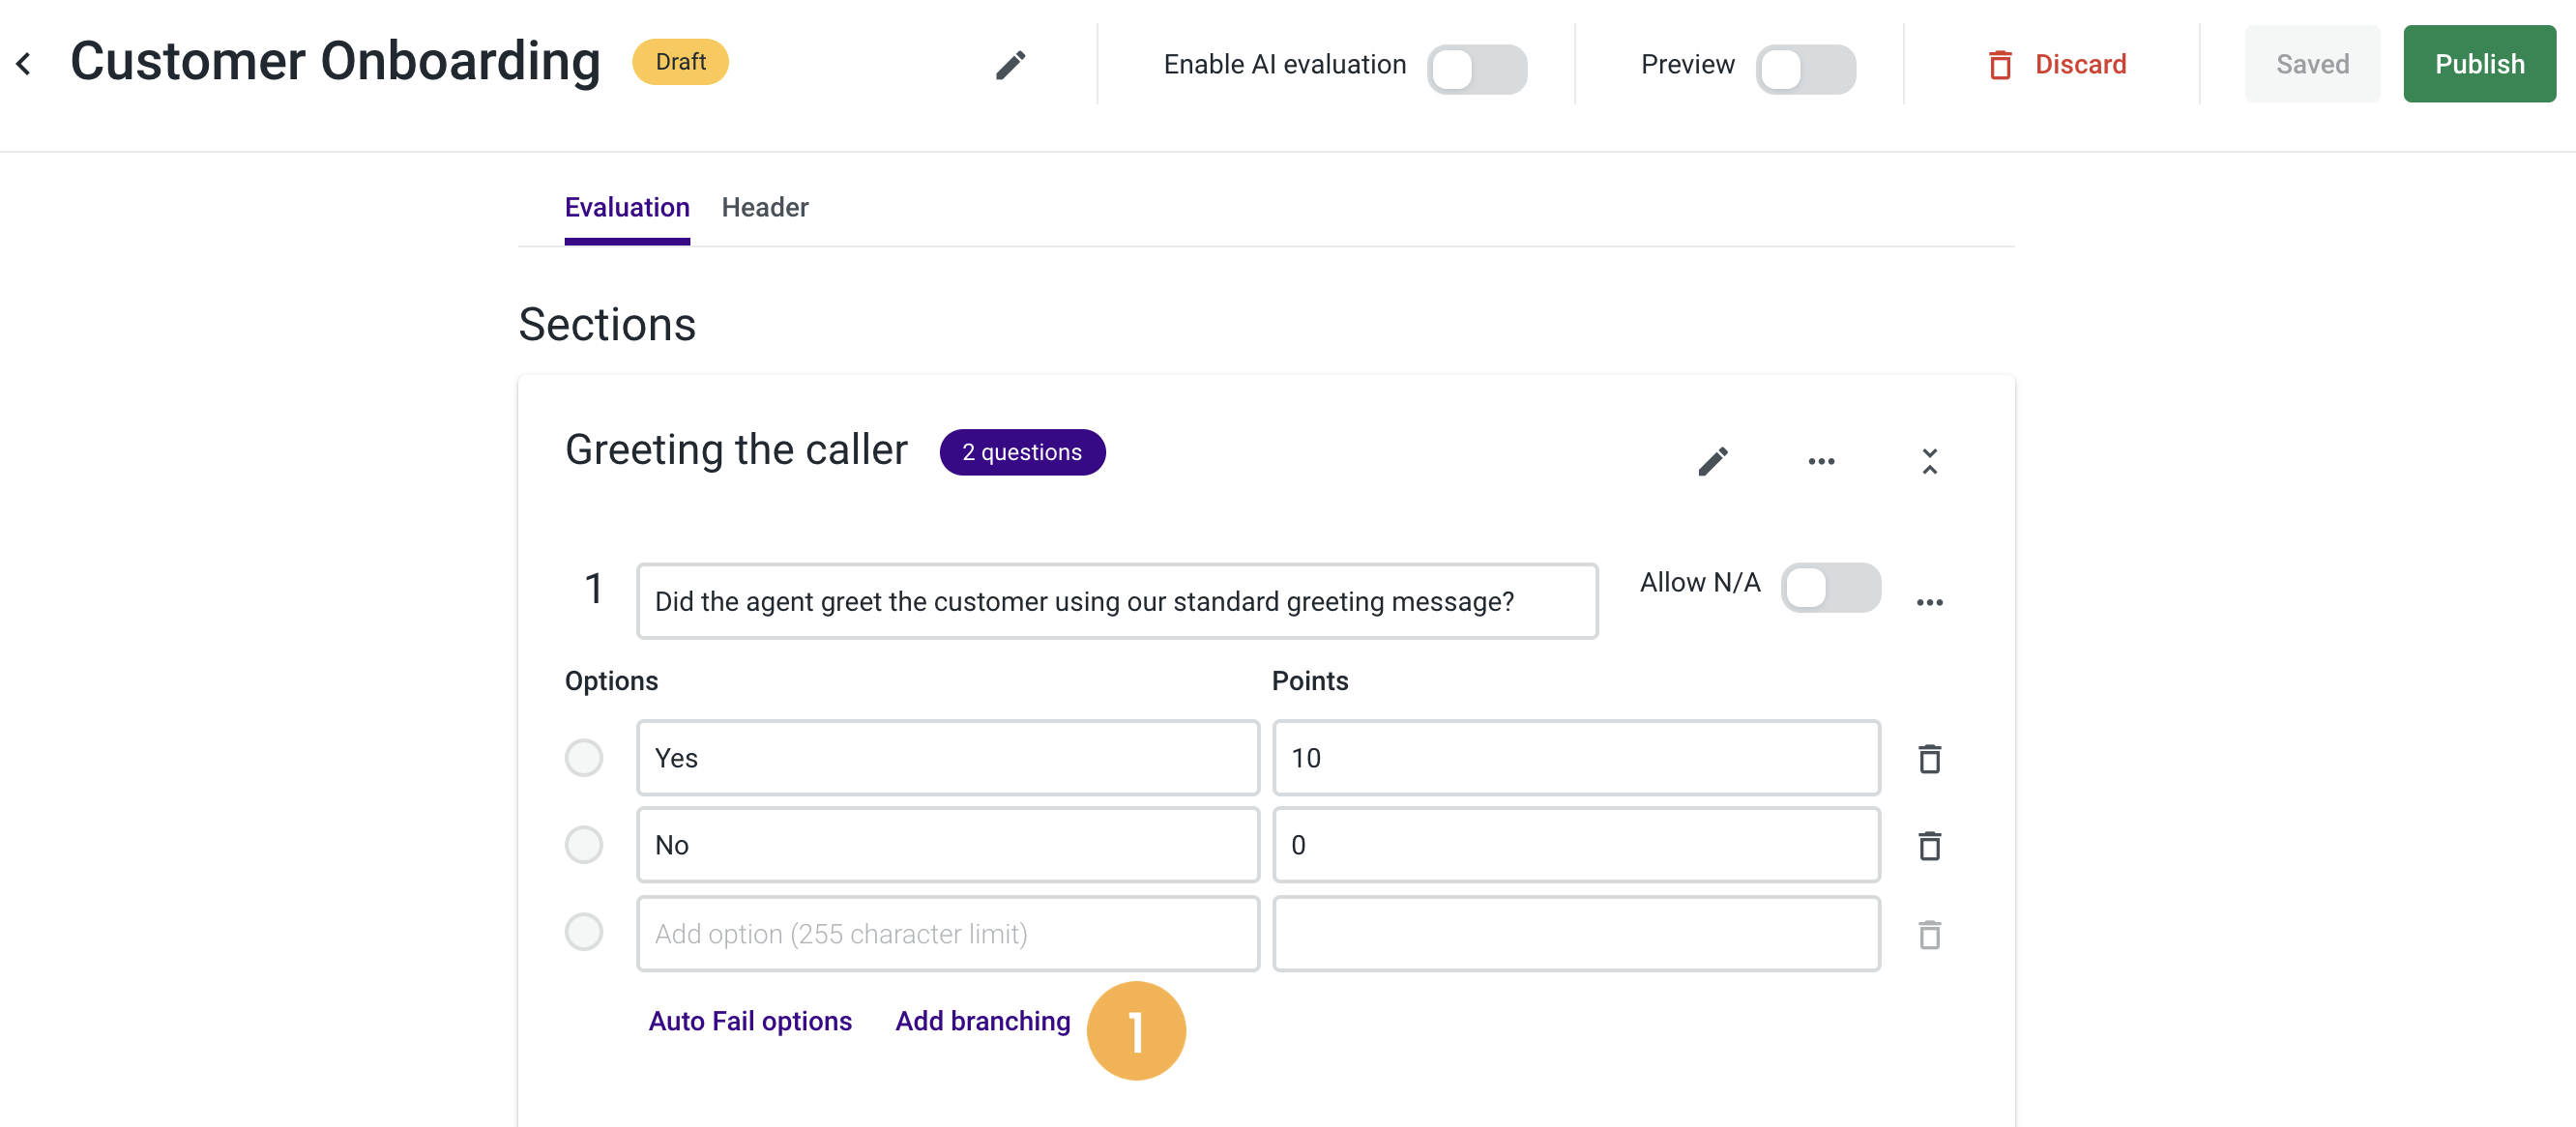 1. Click on the Add branching option [1].
2. Then, a drawer will appear where you can see all the sections, questions, and options available on the form.
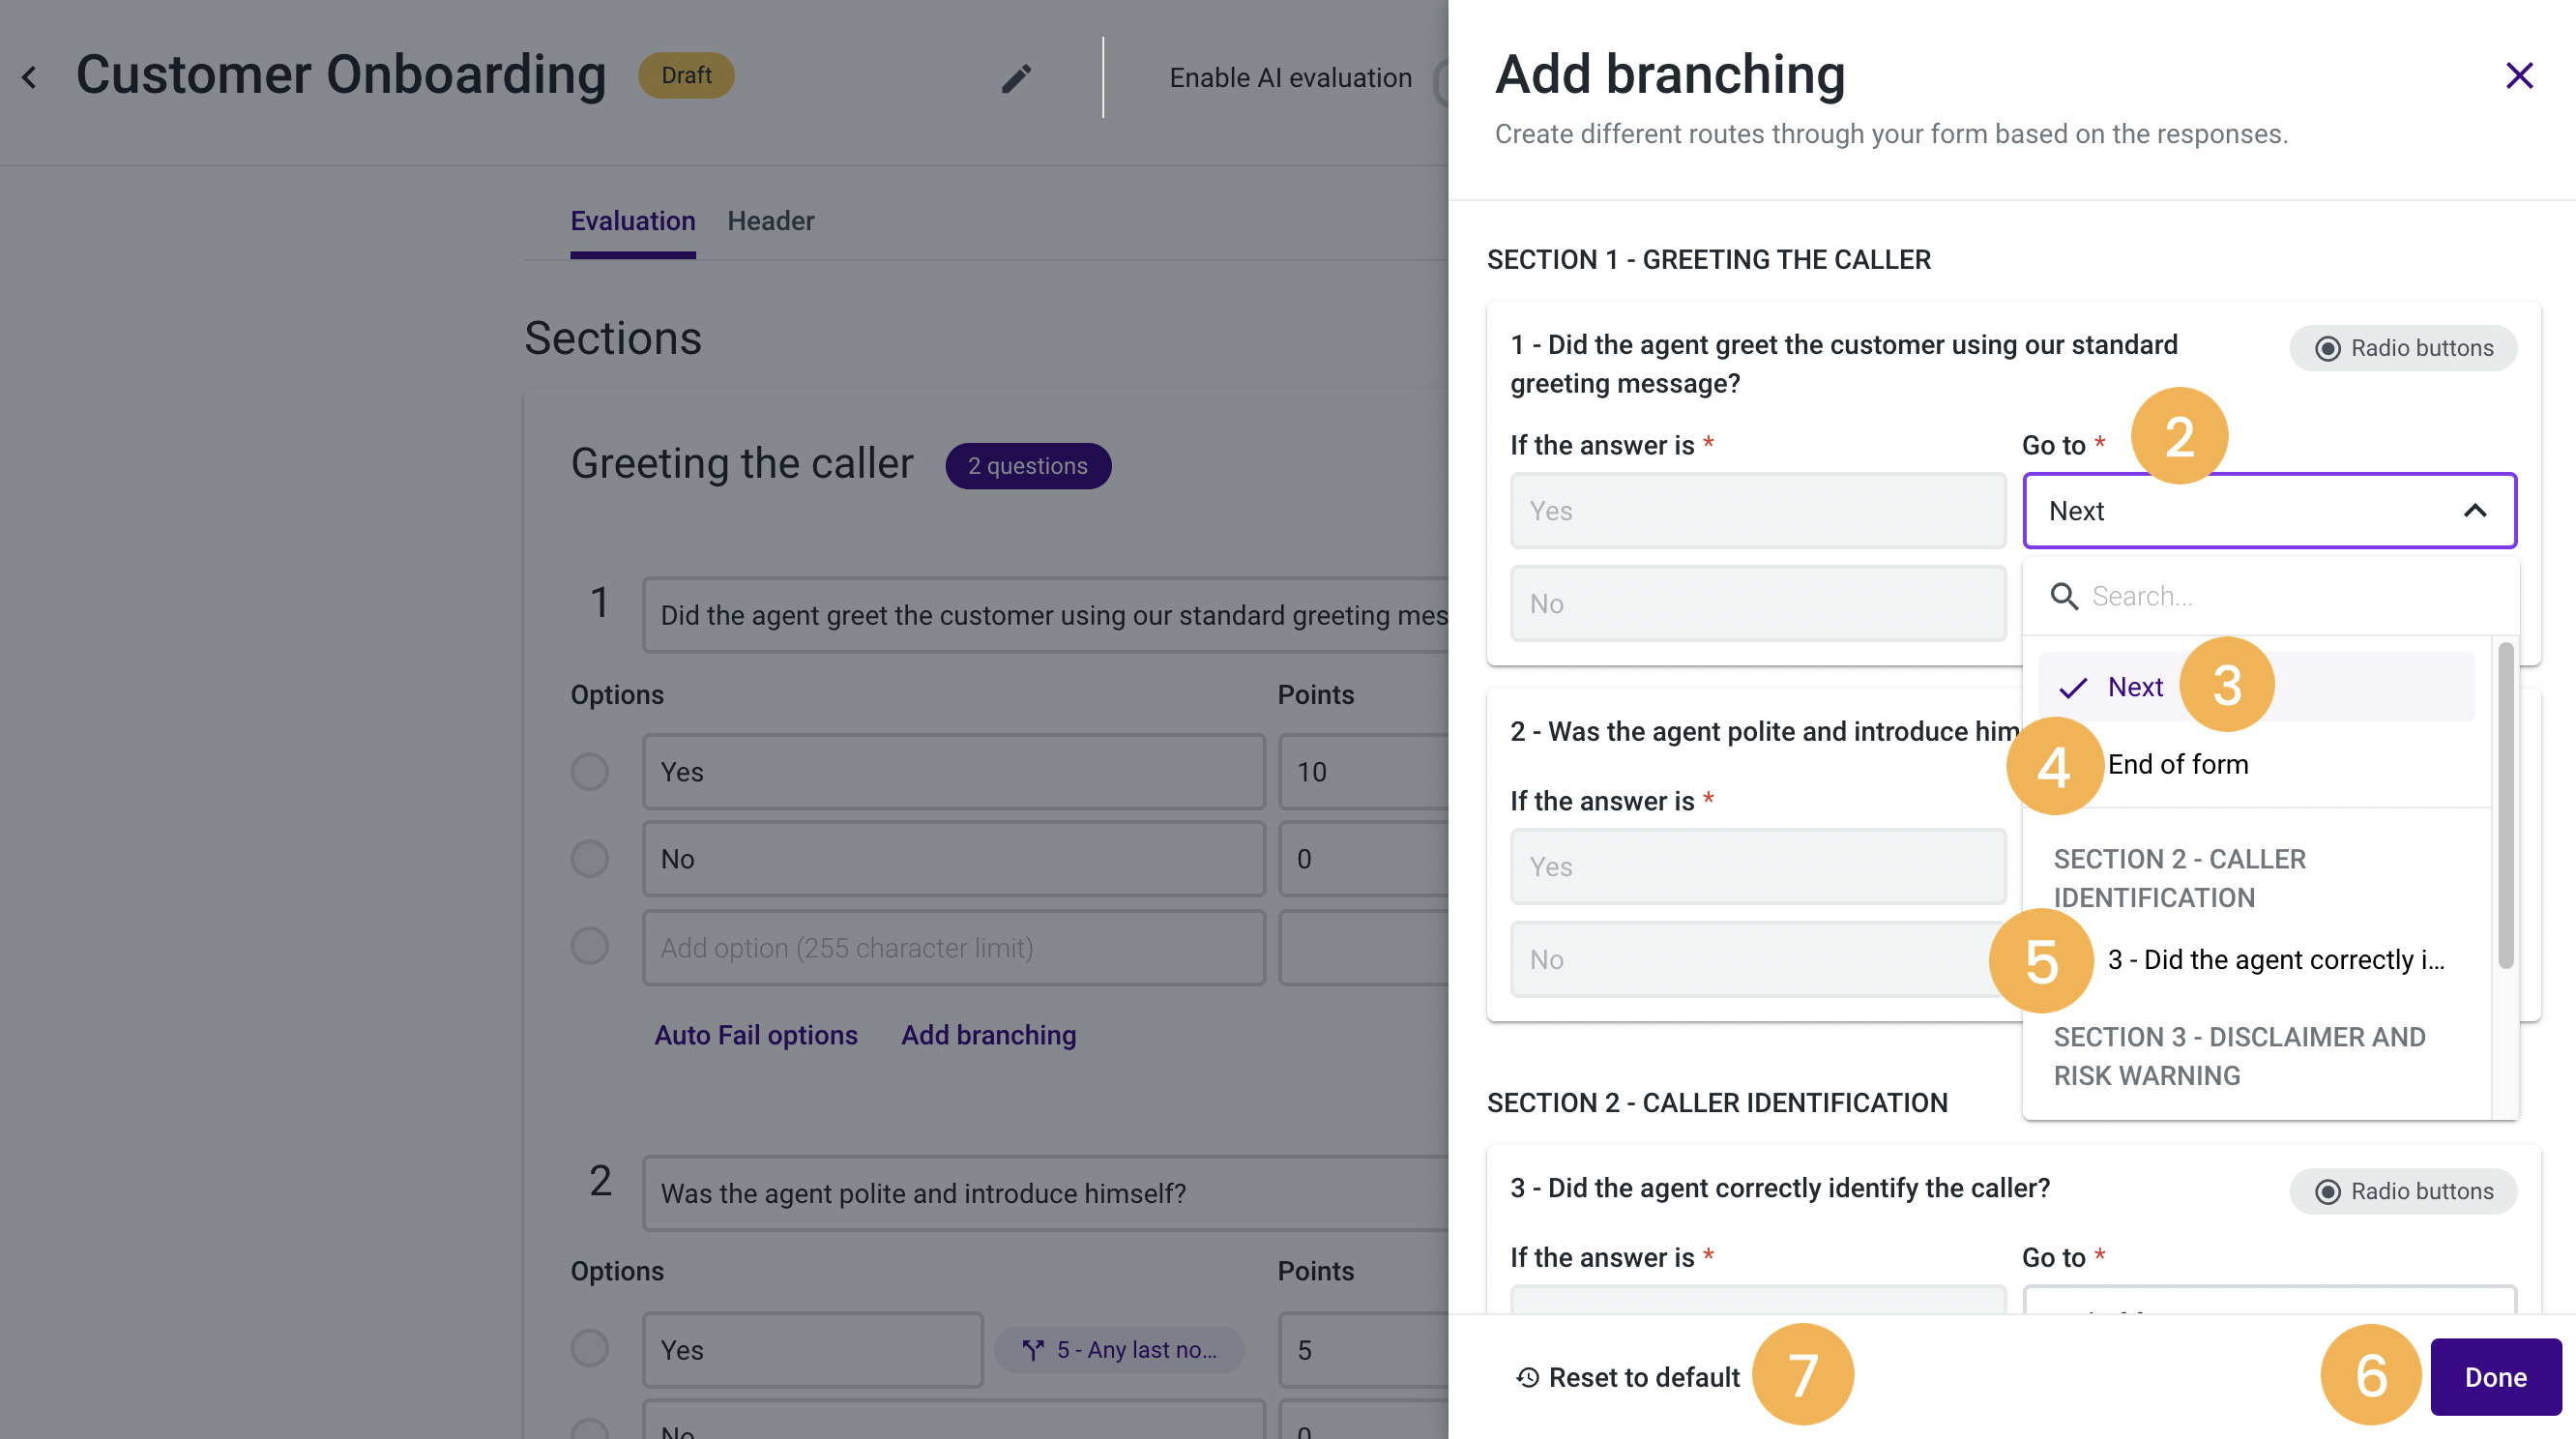
3. Below the “Go to” field [2], click on the arrow to expand, and then, choose between the following options:
- Next [3]: This option is selected by default, so when the users answer the question, they have to go to the next section/question(s).
- End of the form [4]: By selecting this option, the users do not have to go through the whole form, since all the following questions will be disabled and would not count towards the evaluation score. Note: This will happen to all the questions affected by the branching option.
- On each section number and name, you can choose specifically to which question the user must be directed [5].
4. Click on the Done button [6]. Note: In case you wish to remove the branches options (the questions that are only shown if the answer that enables them is selected) you have chosen, select the “Reset to default” option [7].
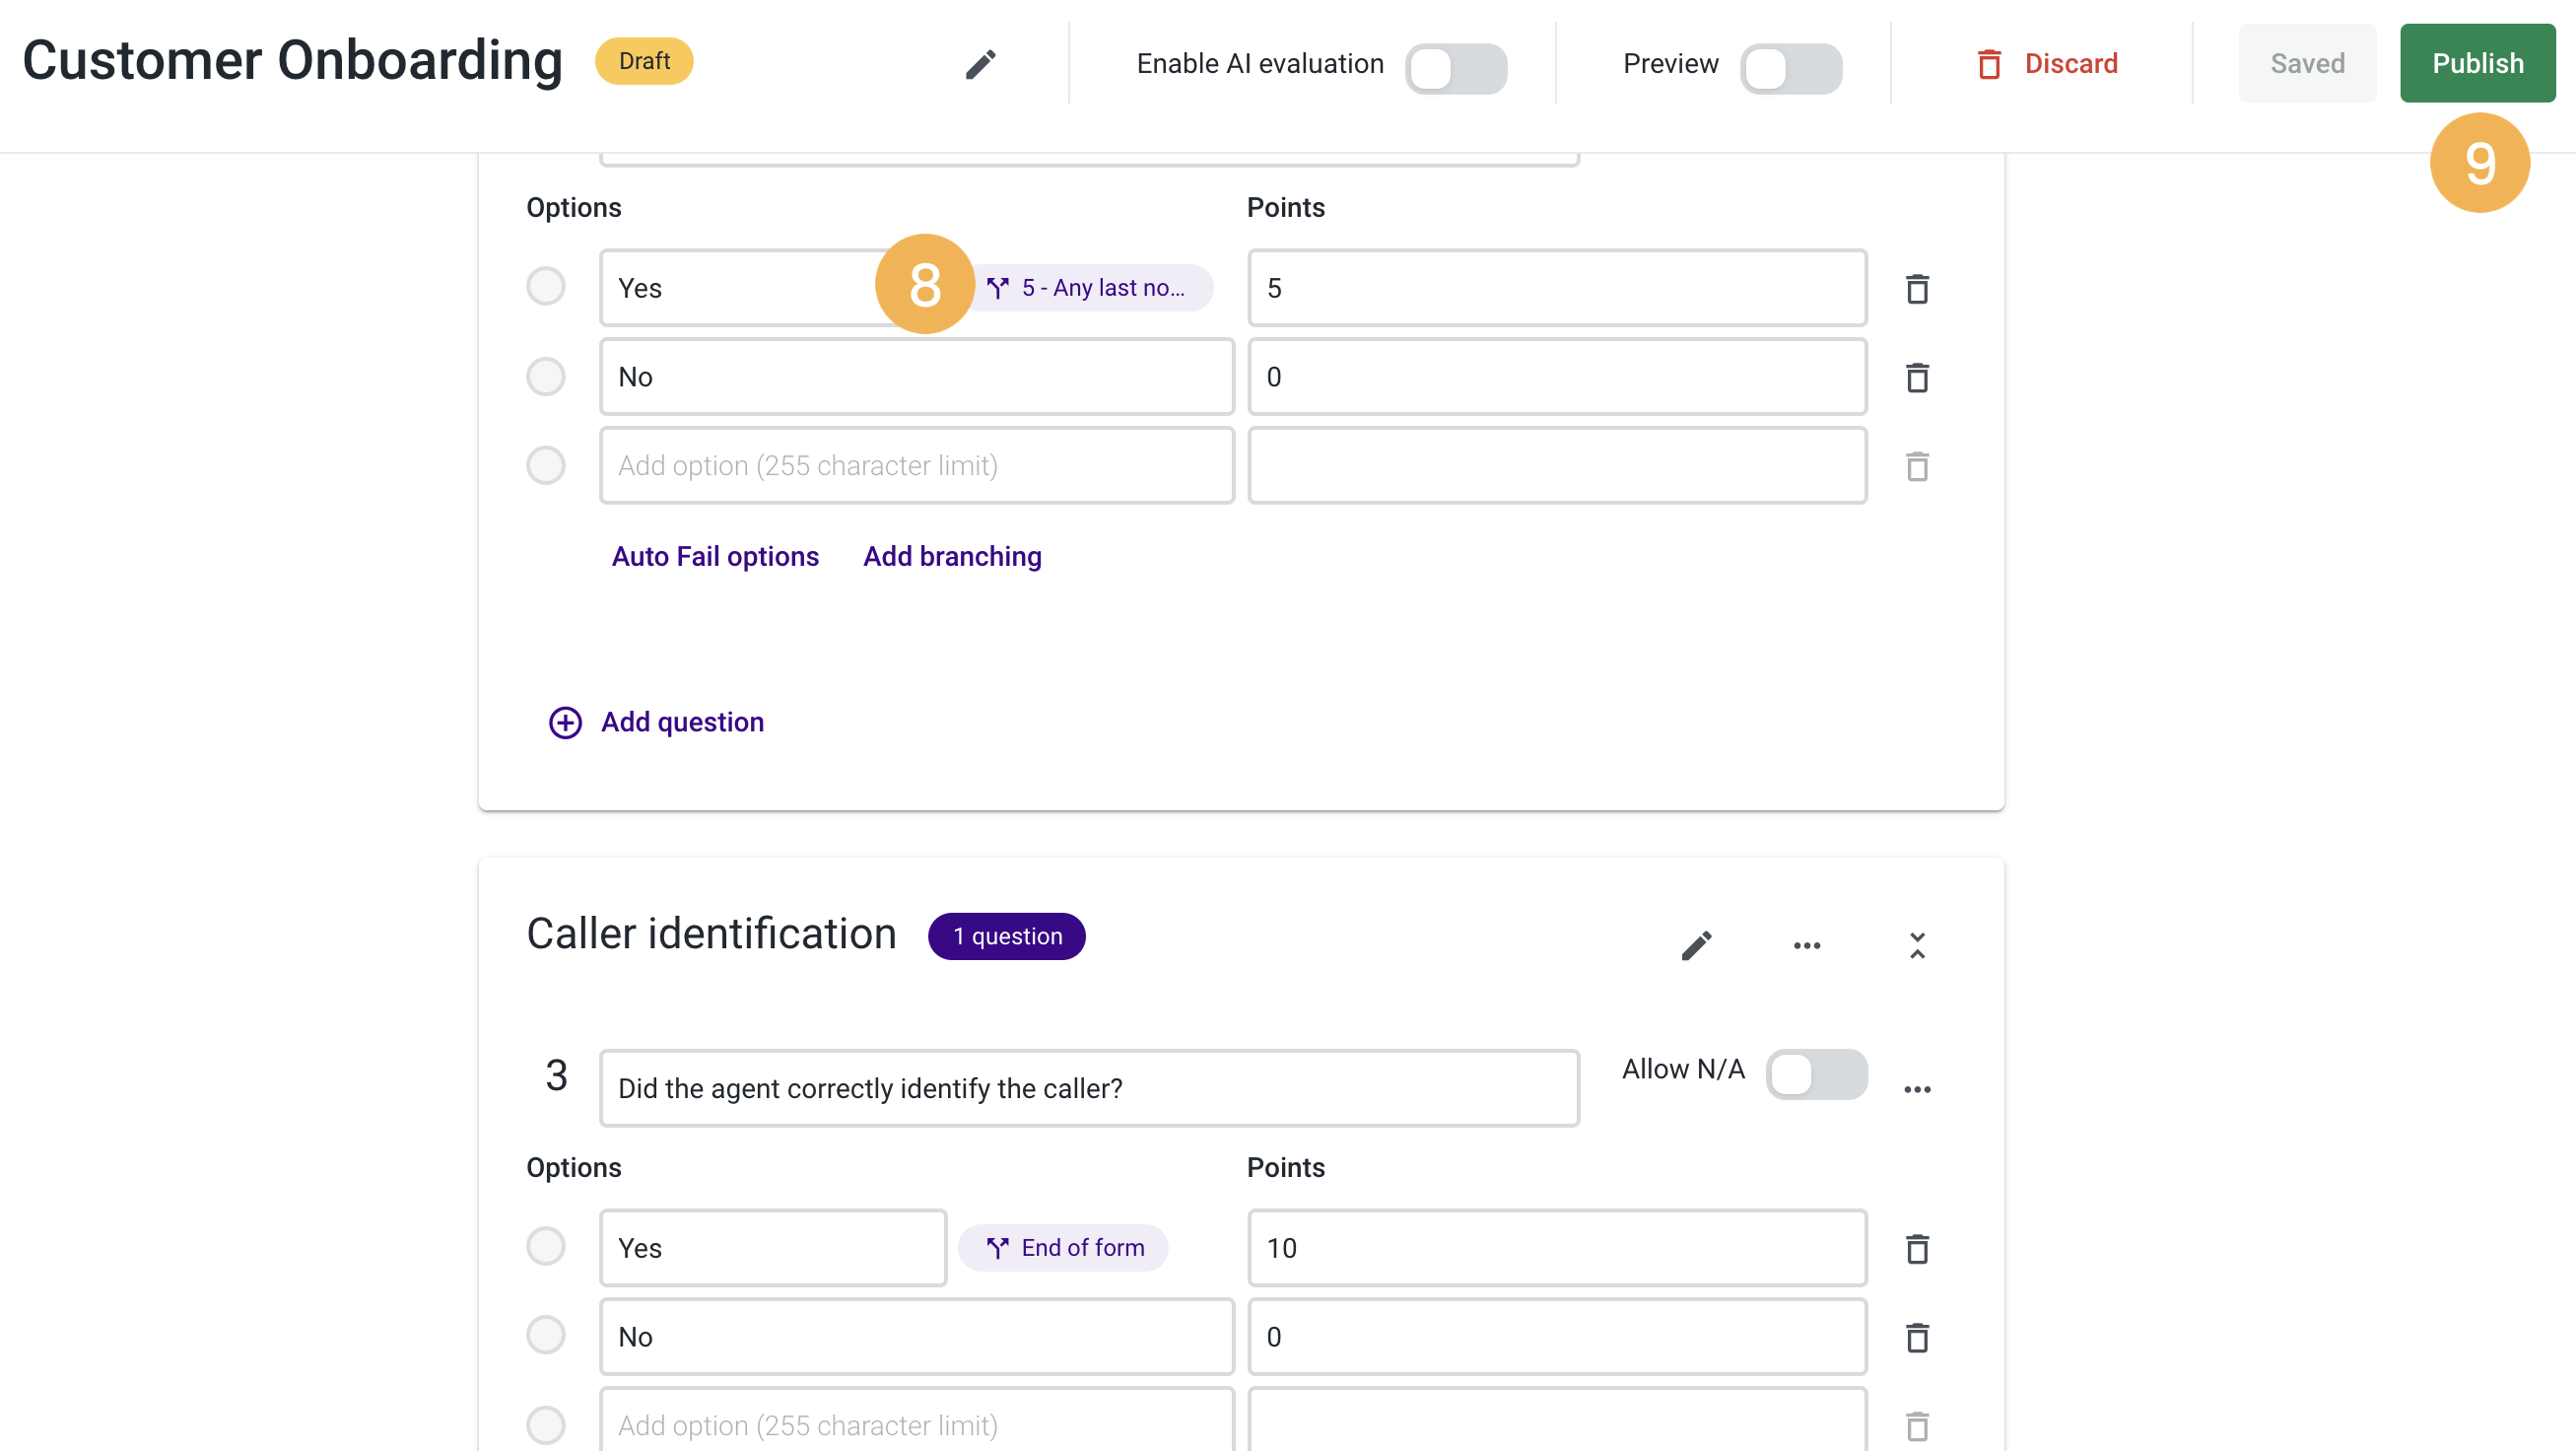
5. After choosing the branches options, they will be identified on the form builder with the corresponding labels displayed next to them [8].
6. Once you’re finished building the form and configuring the branching options, click on Publish [9].
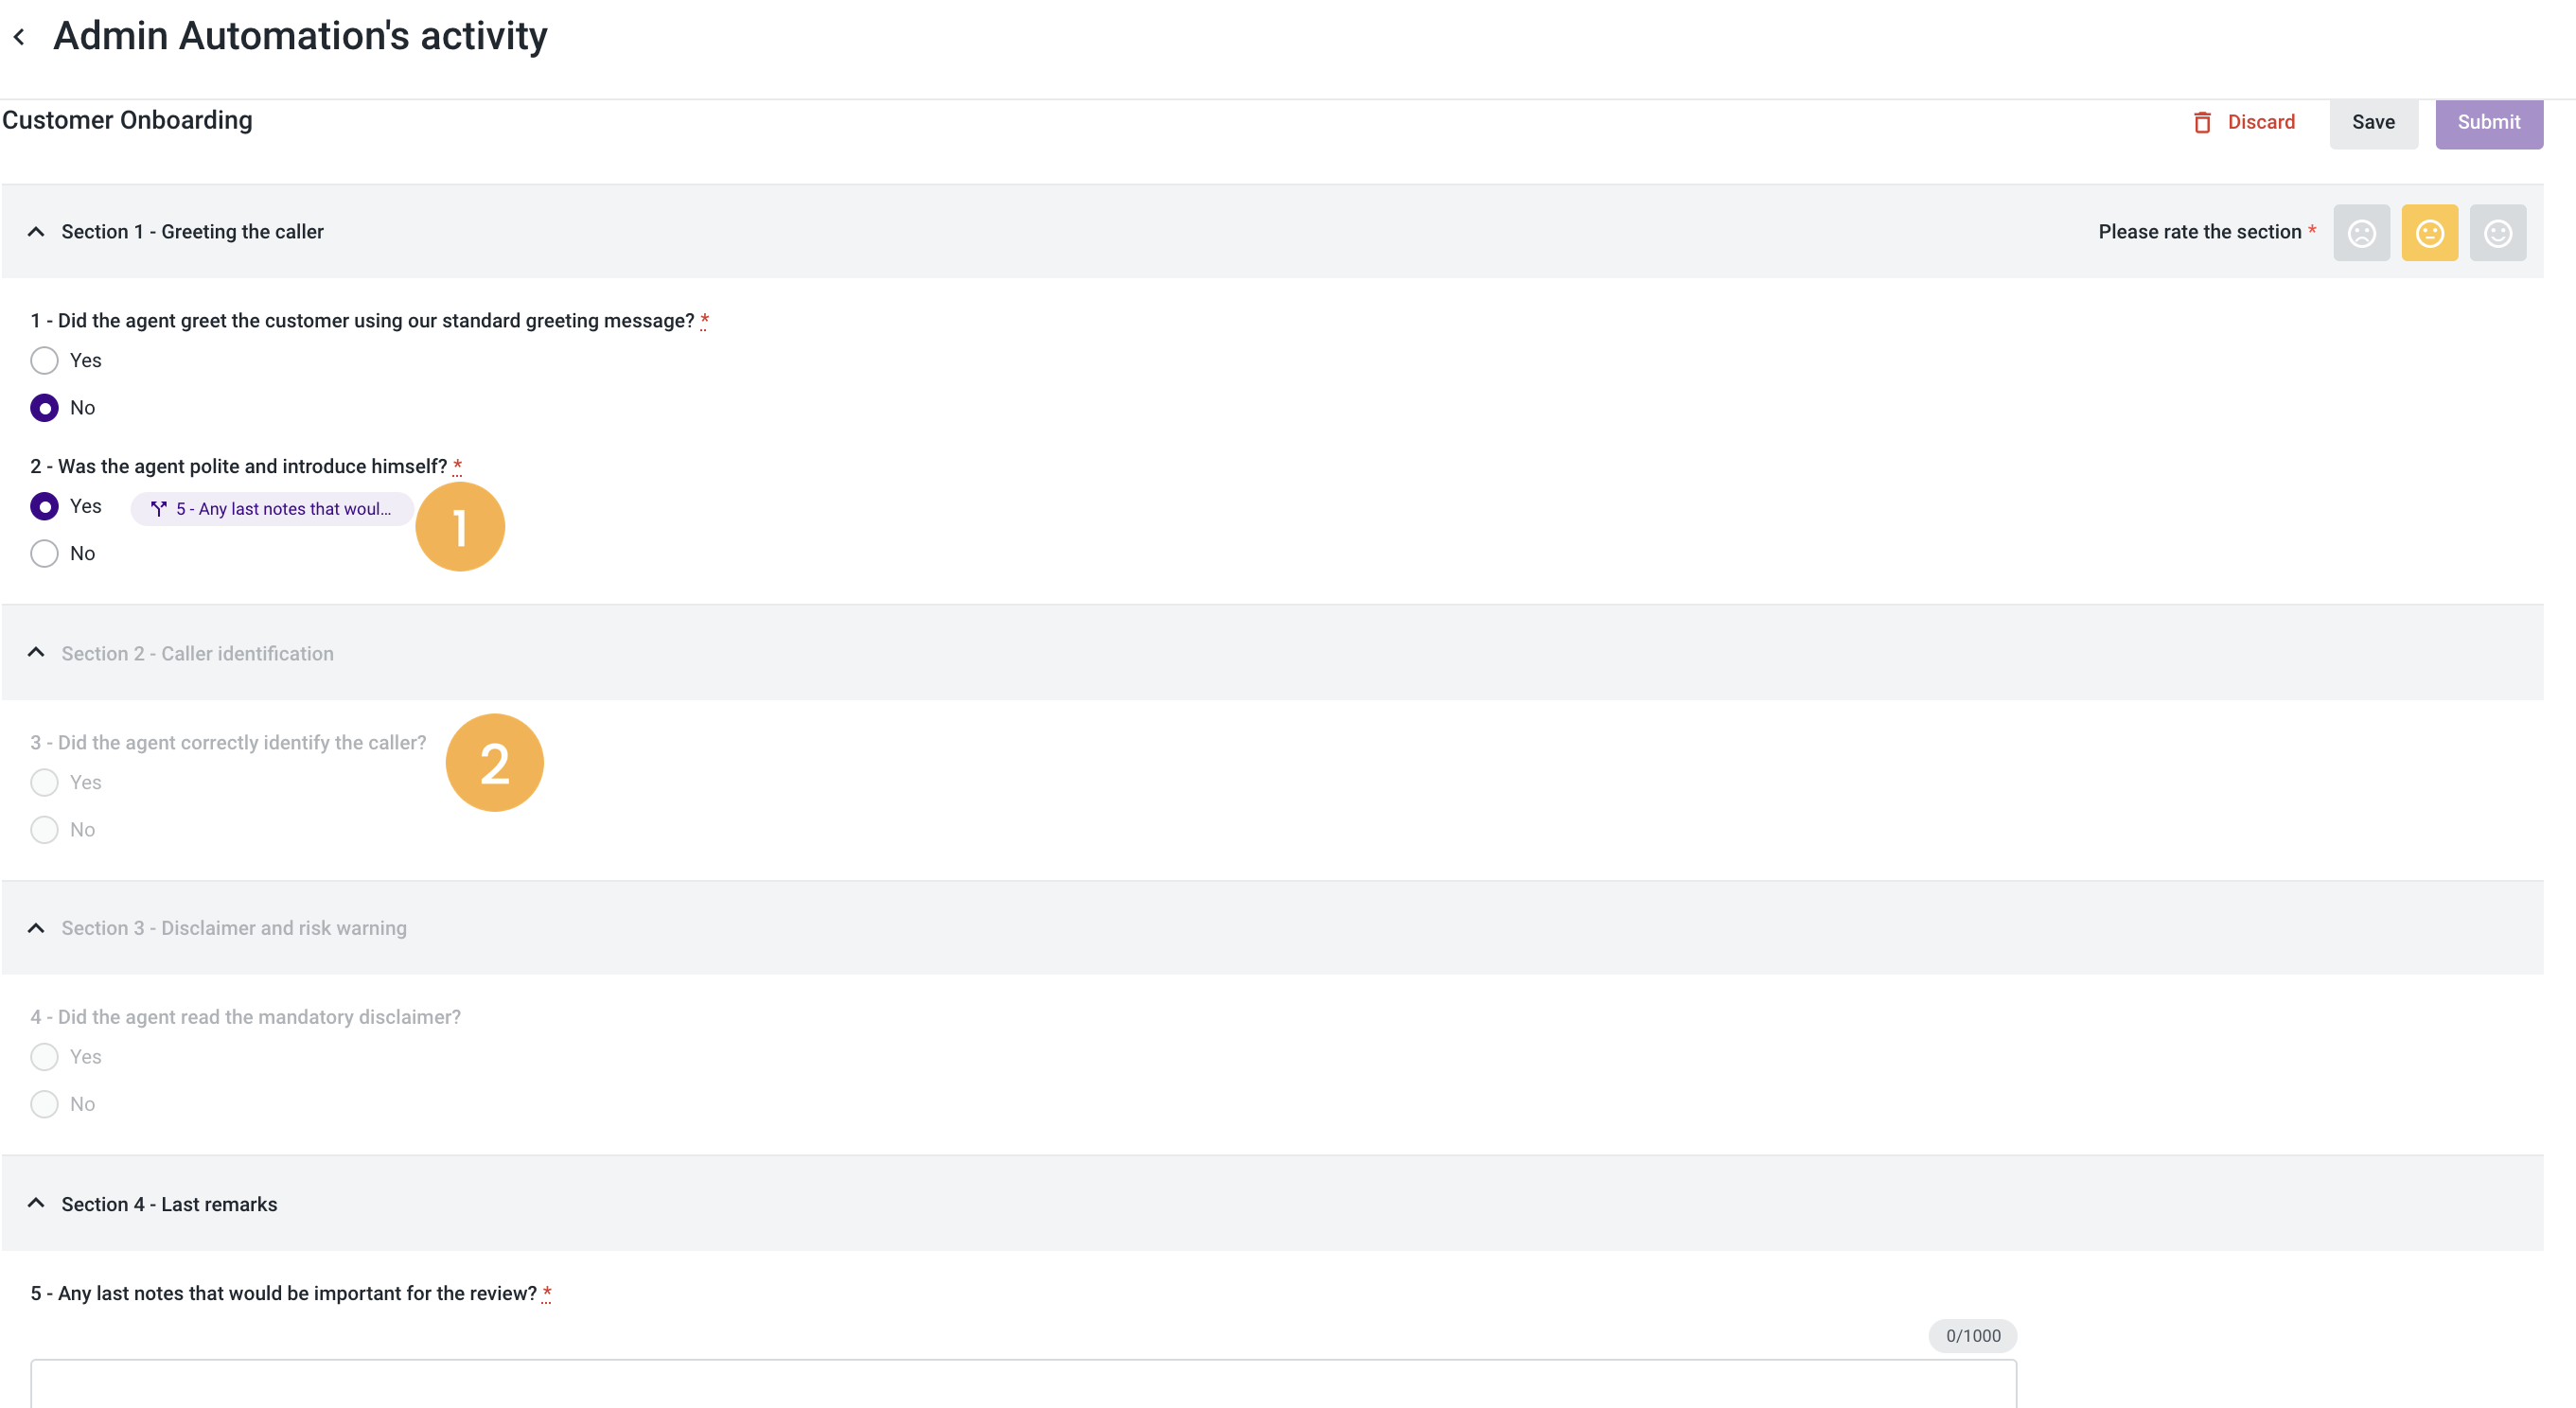
After publishing the form, on the “Evaluations” page when applying this feature to an evaluation, the evaluator will be able to see a label next to the answer options where branching was selected [1]. Besides this, the “skipped” questions where branching was applied, appear as disabled [2].
Branching Examples
Below, you can find two examples of the branching feature application while building a form:
Example 1:
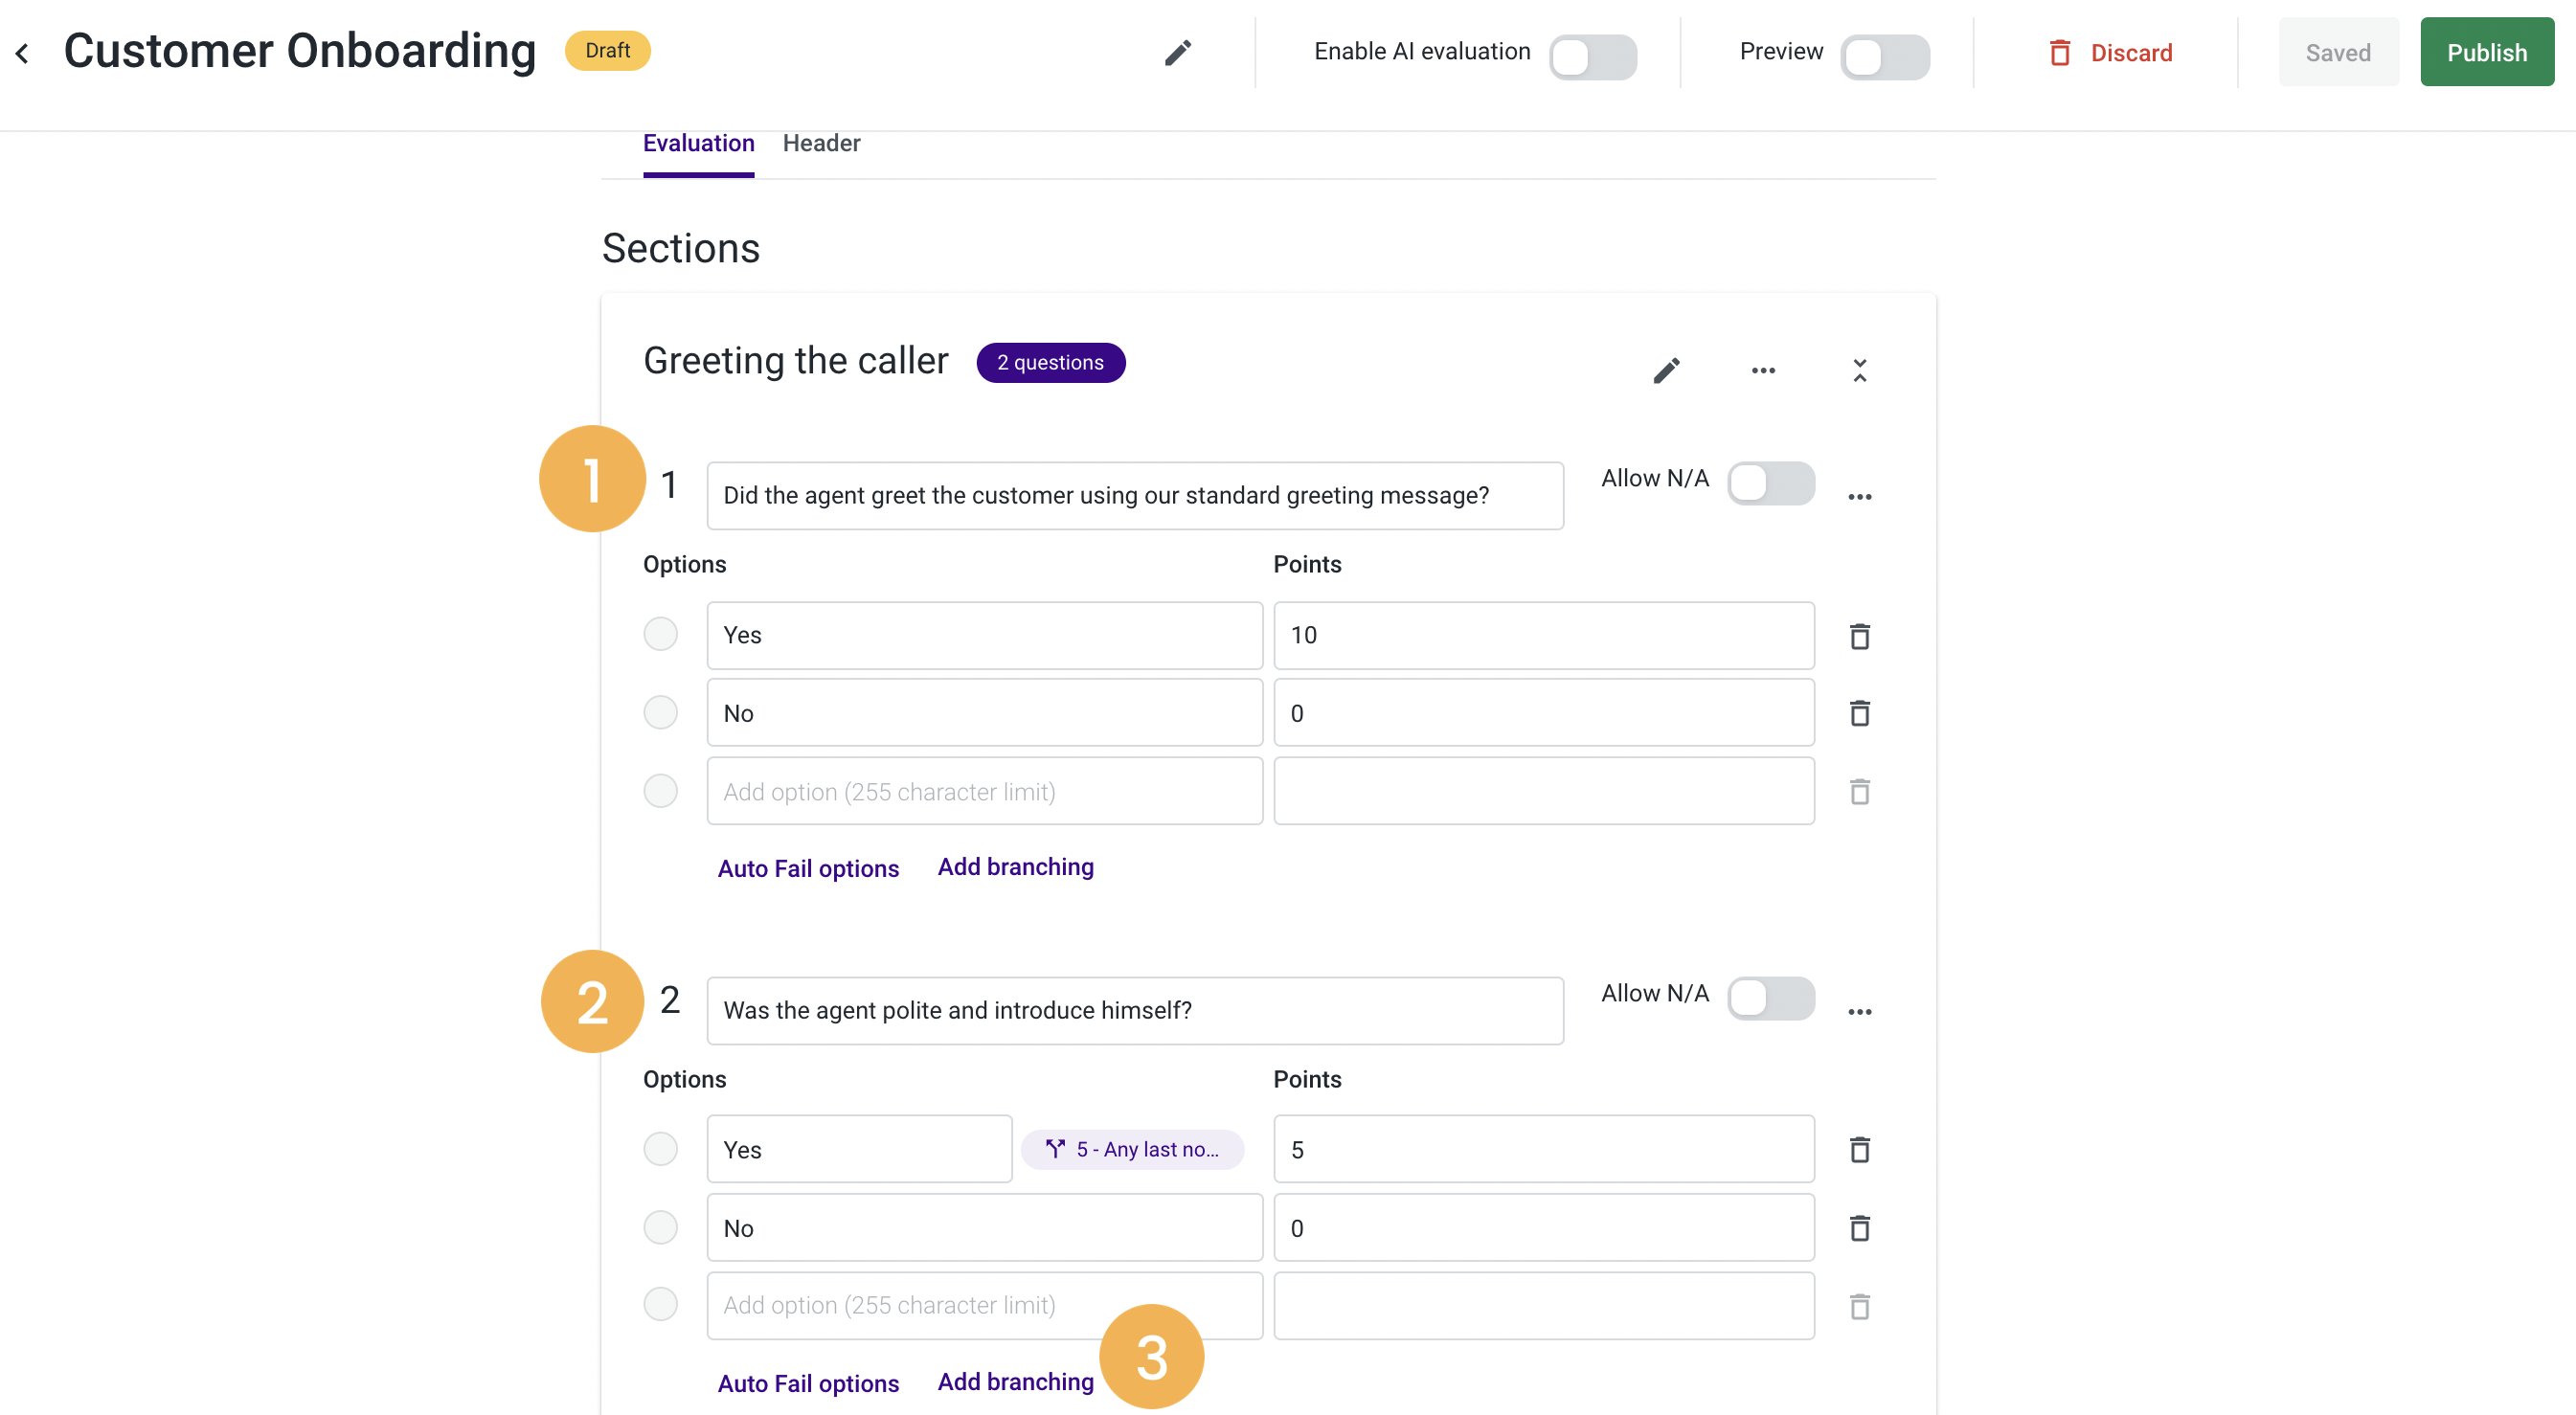
In this form, your goal is to evaluate the agent in terms of greeting the customer, so you ask the following questions:
- “Did the agent greet the customer using our standard greeting message?” followed with “Yes” or “No” as answers [1].
- “Was the agent polite and introduced himself?” and “Yes” or “No” as answers [2].
In case the agent greeted the customer accordingly and was polite while doing so, the questions below do not need to be answered, and you can go directly to the last section (“Last remarks”). To know how to do so, please follow the steps below:
1. Select the Add branching option [3].
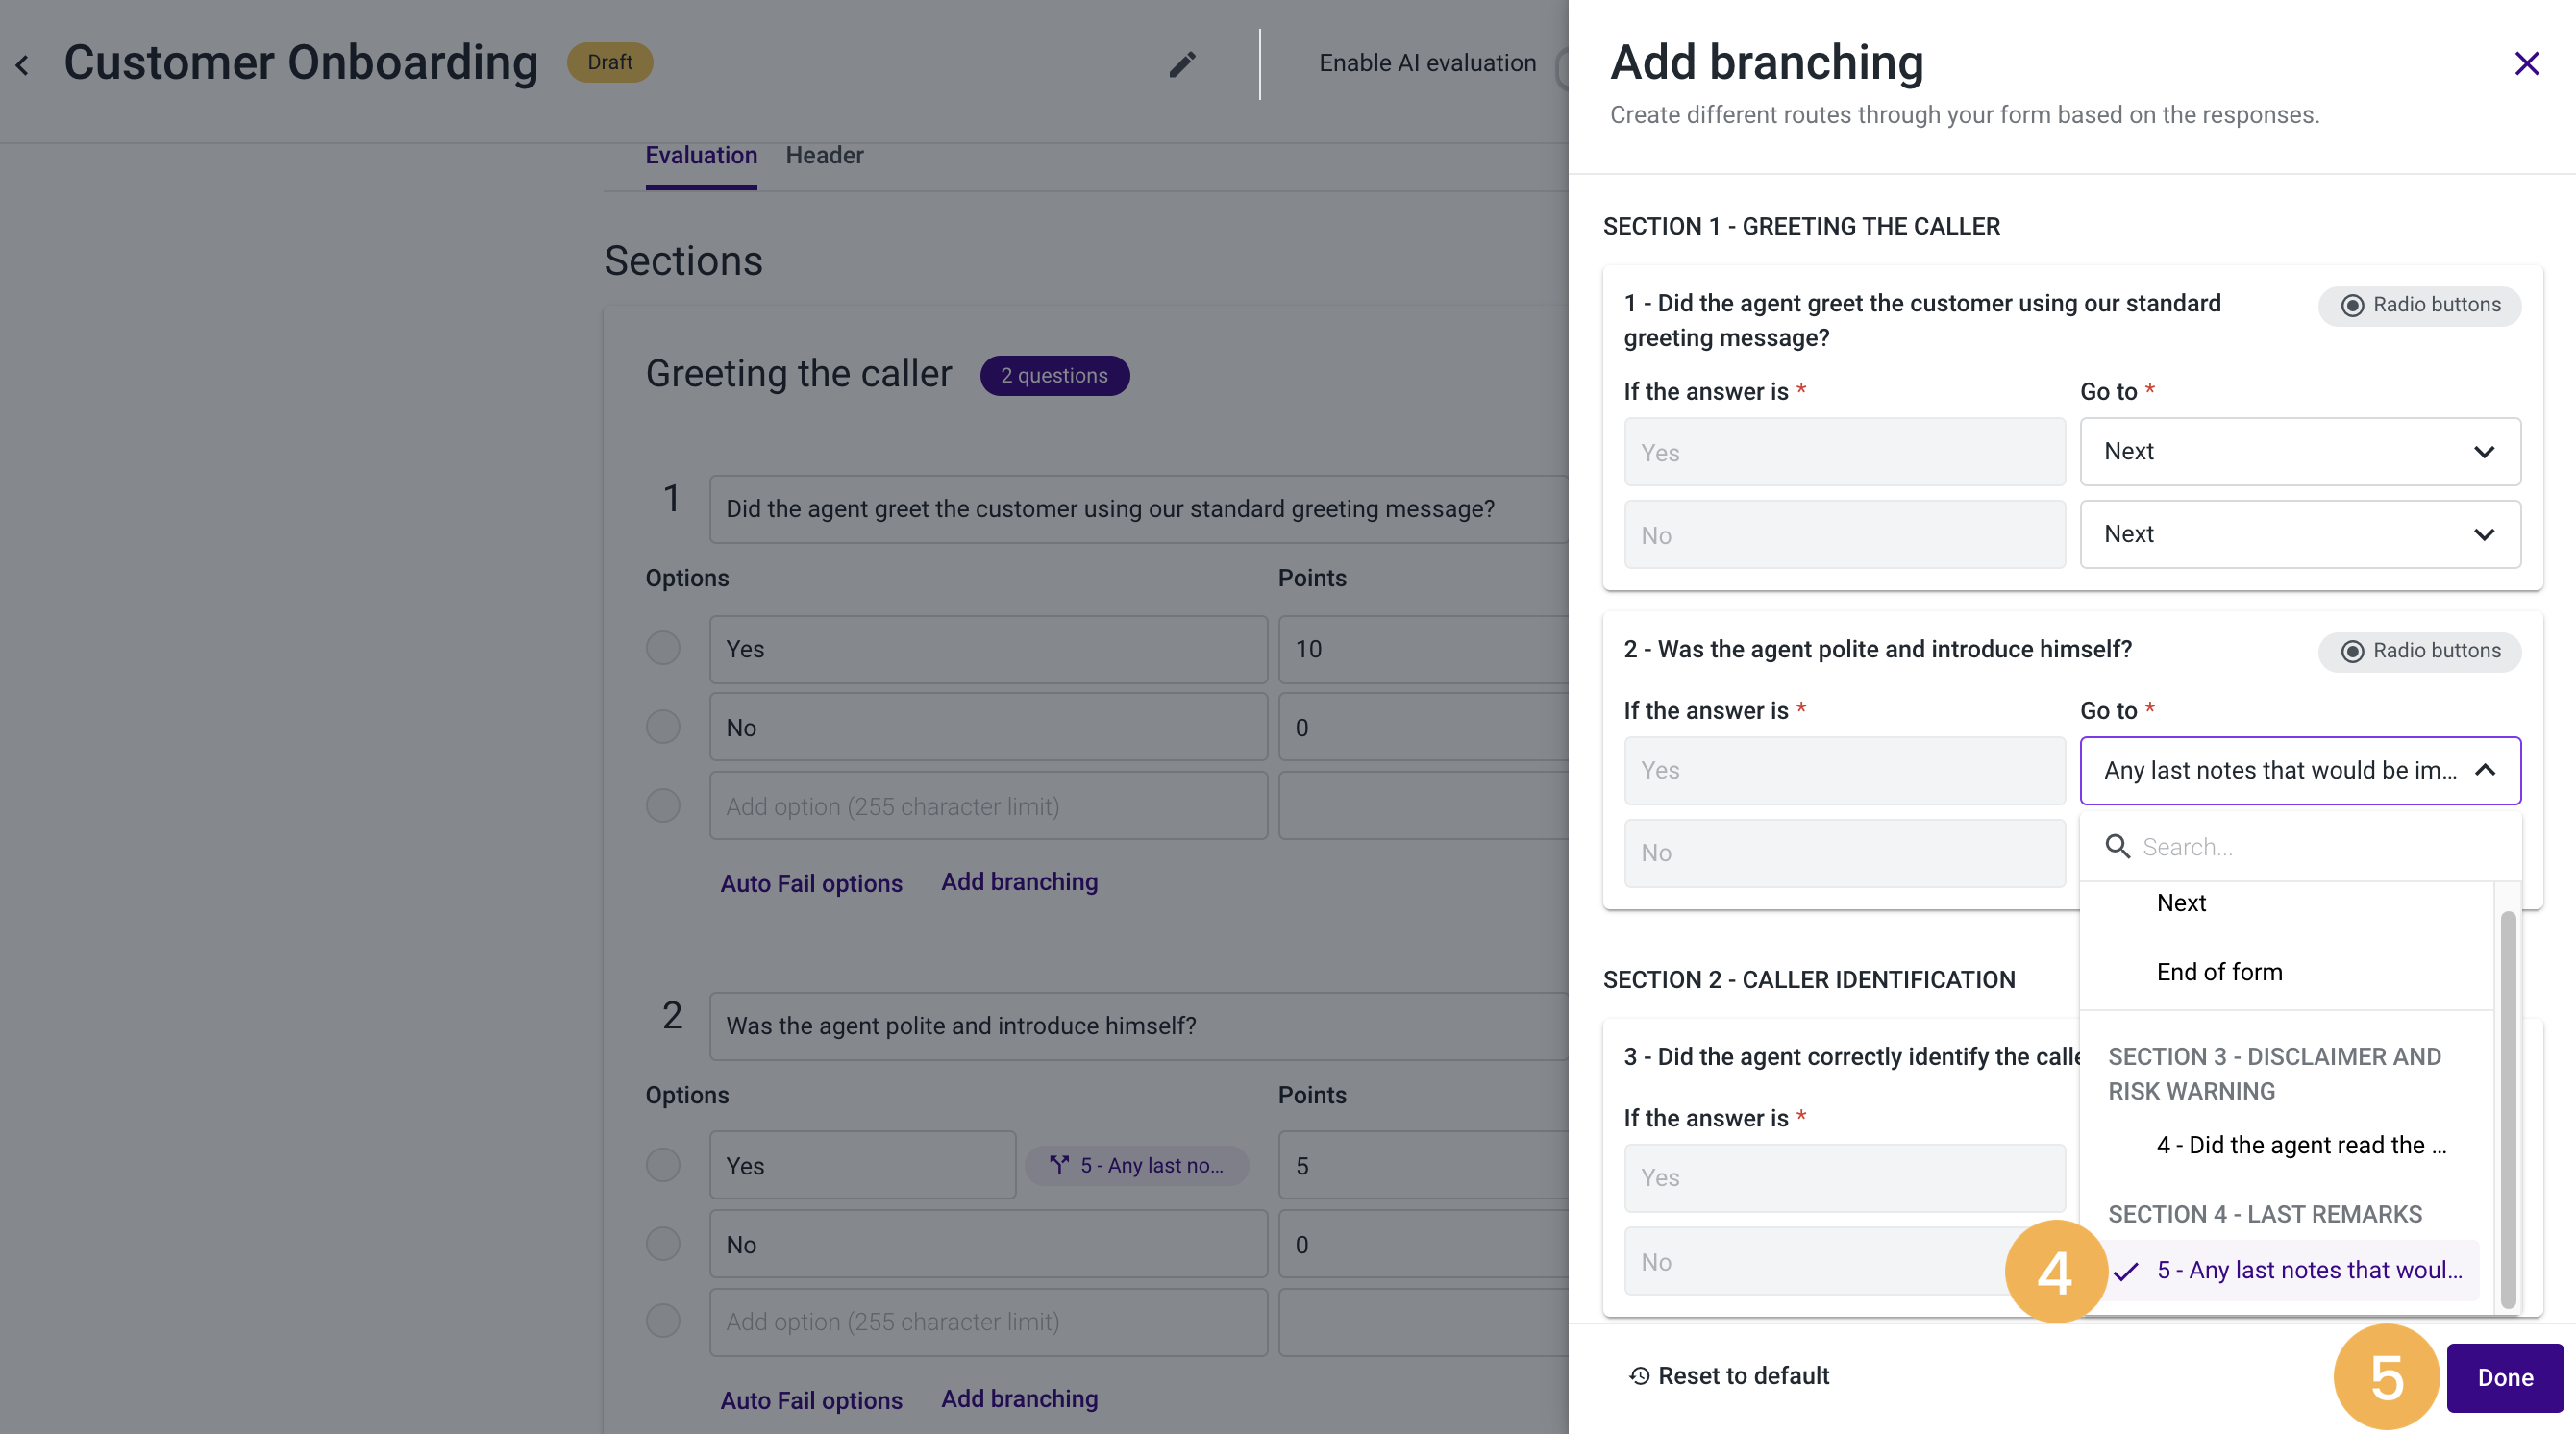
2. Next to the “Yes” answer, on the “Go to” field, select the option Any last notes that would be important for the review? [4].
3. Click on the Done button [5].
Example 2:
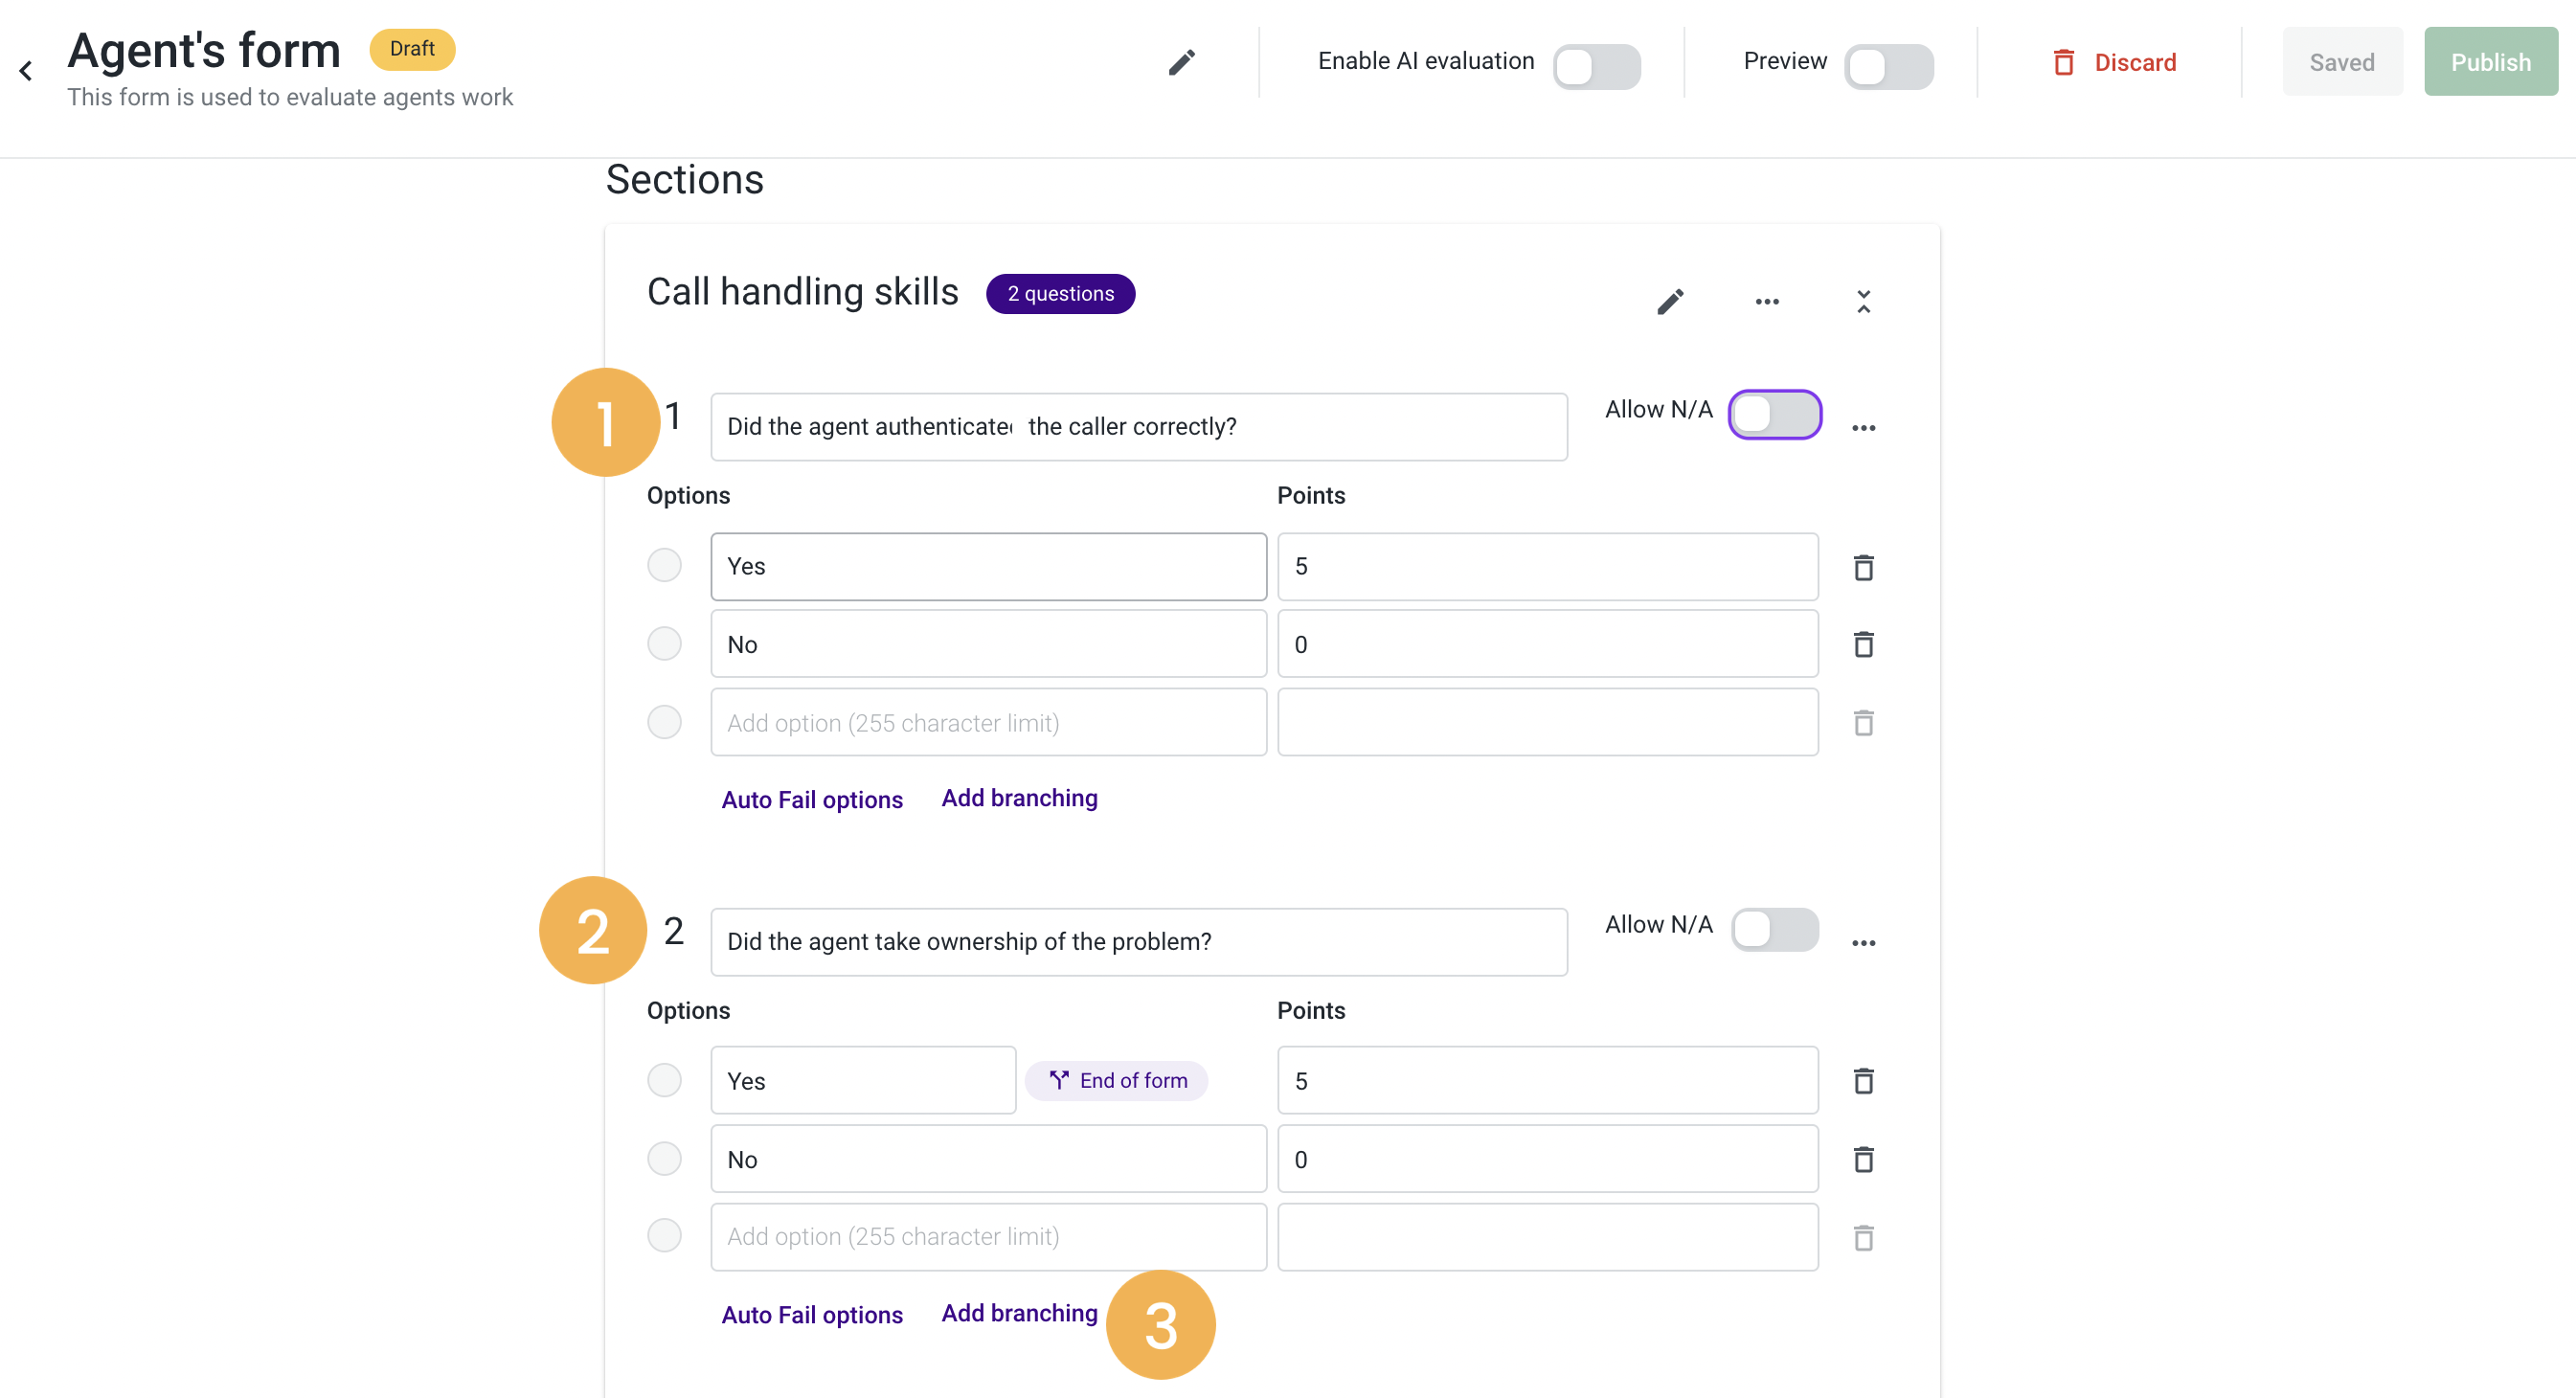
In this form, your goal is to evaluate the agent’s calling skills, so you ask the following questions:
- “Did the agent authenticate the caller correctly?” followed with “Yes” or “No” as answers [1].
- “Did the agent take ownership of the problem?” followed with “Yes” or “No” as answers [2].
In case the agent took ownership, the following questions do not need to be answered, so you can end the form there. To do so, please follow the steps below:
1. Select the Add branching option [3].
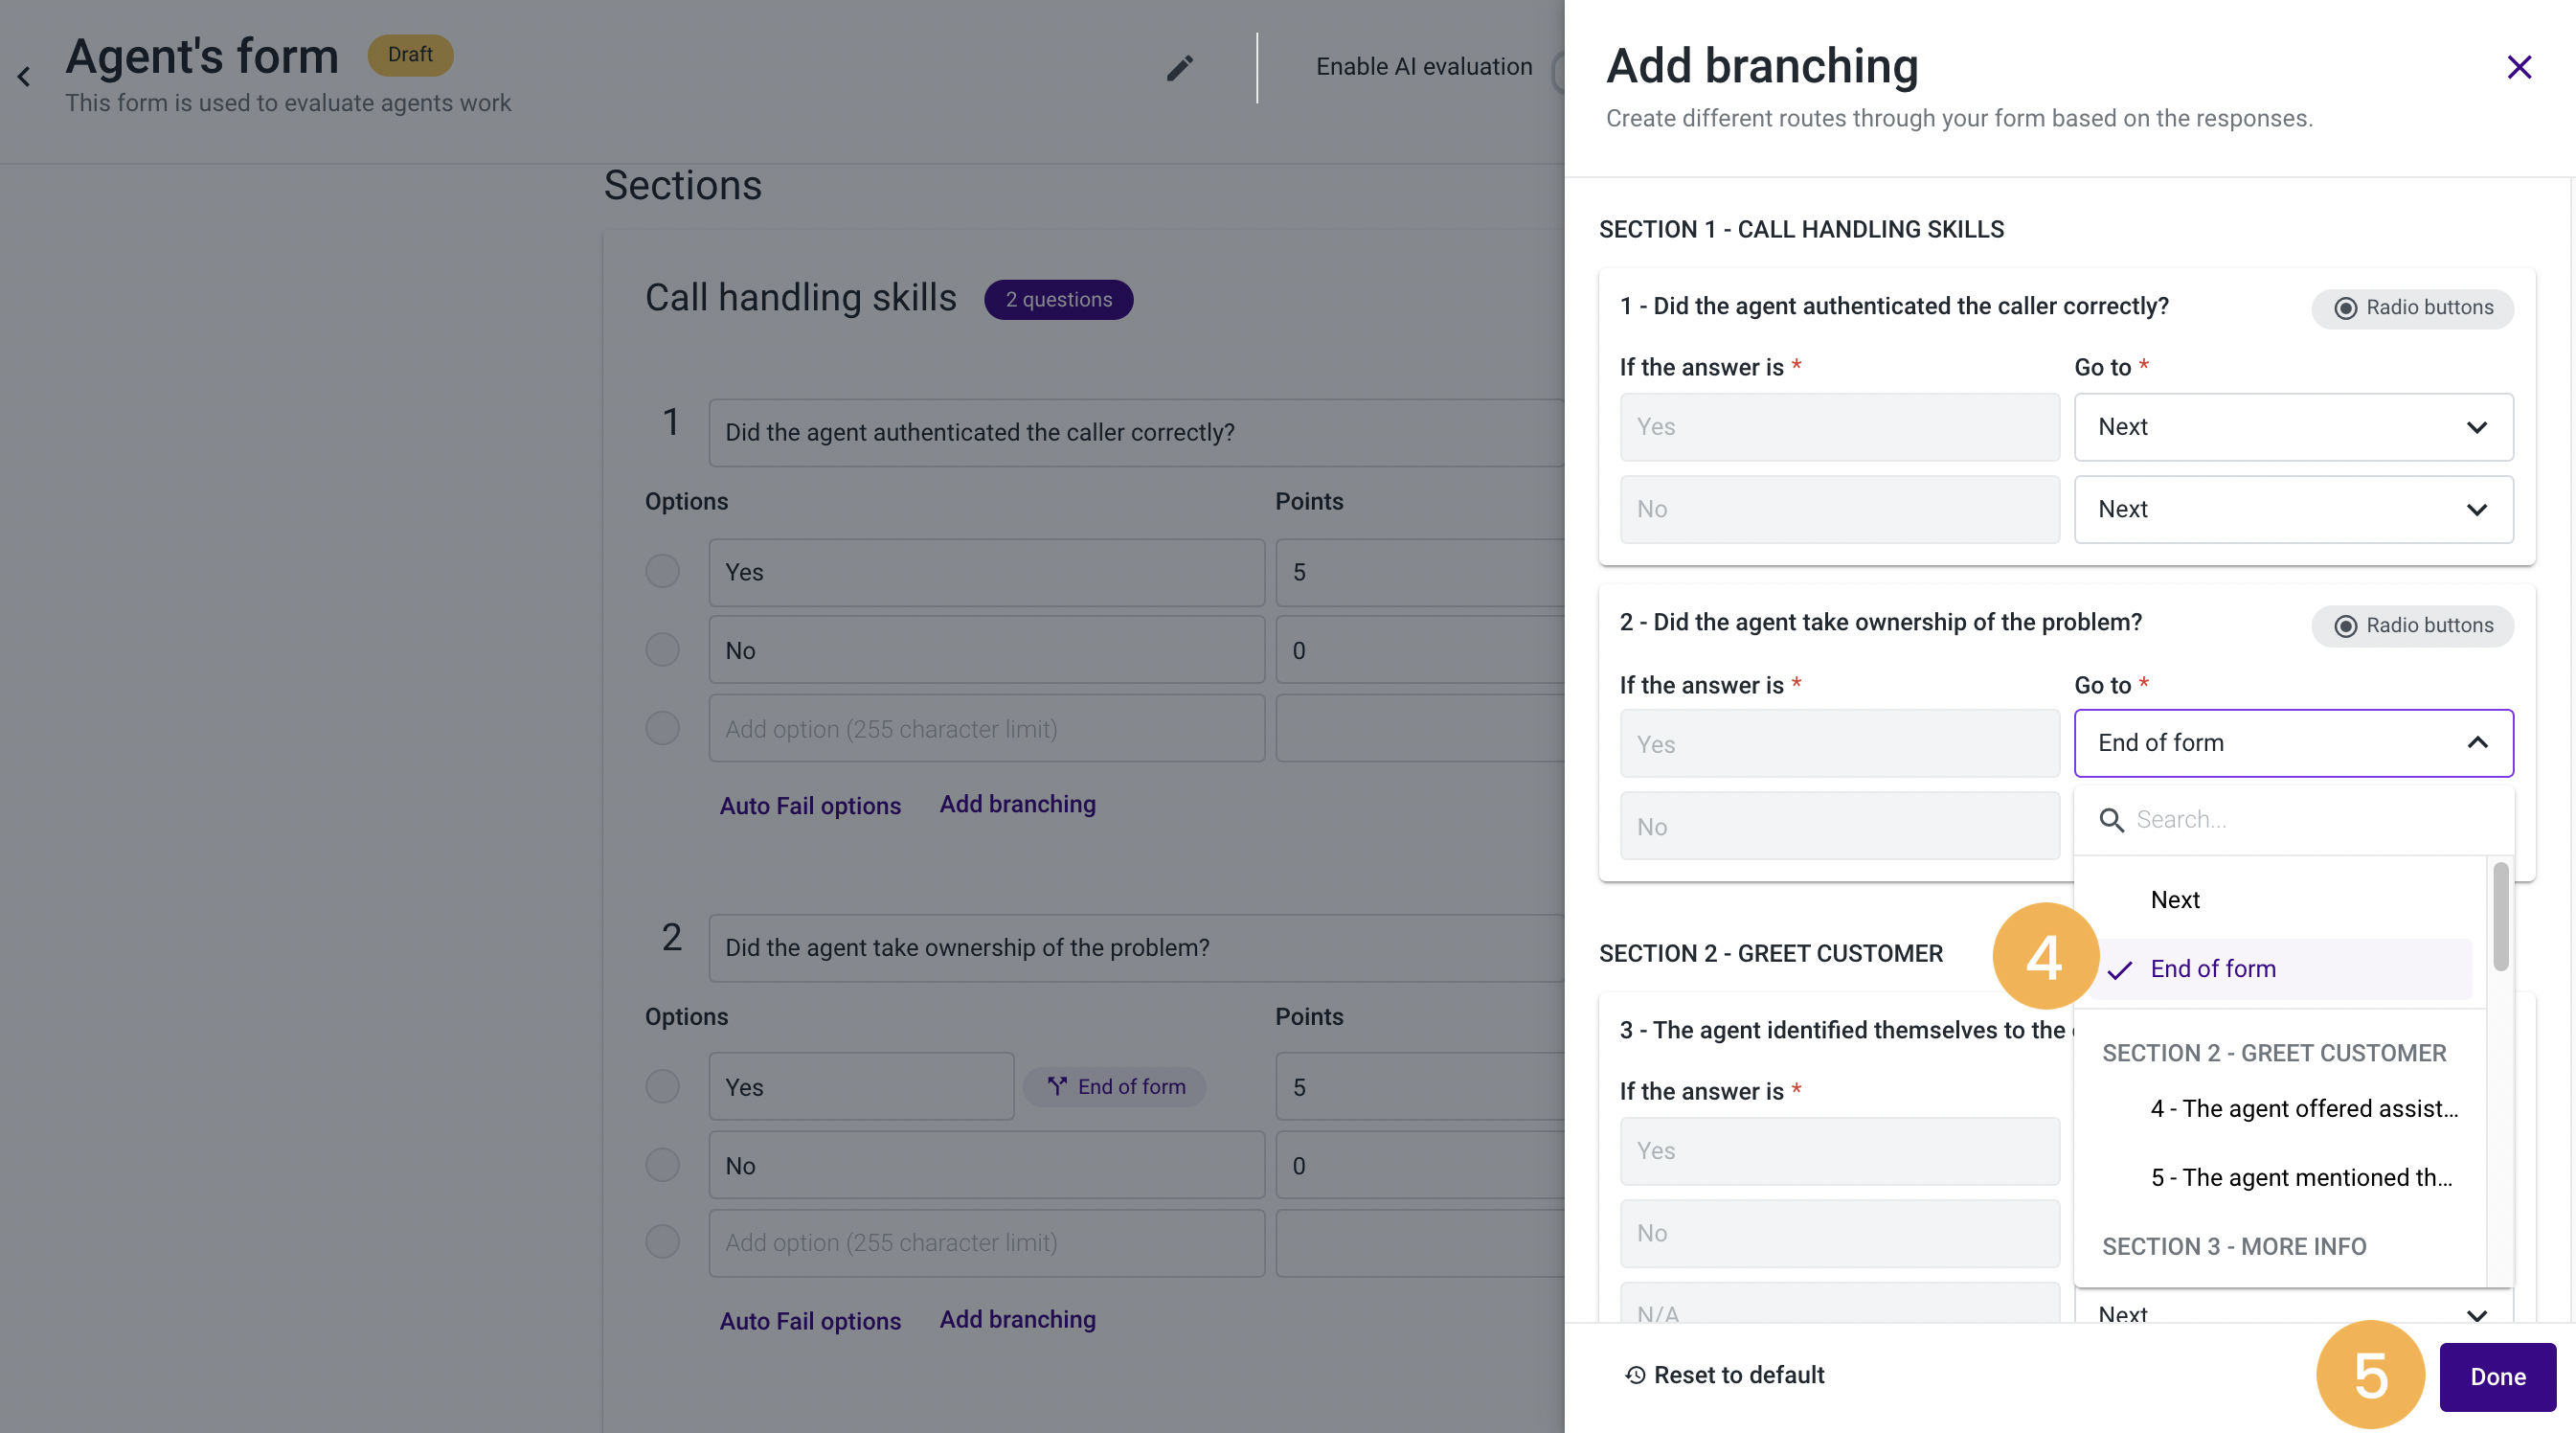
2. Next to the “Yes” answer, on the “Go to” field, select the option End of form [4].
3. Click on the Done button [5].