When there are multiple cases about the same request, Agents can merge all related cases into a single case, thus eliminating redundancy.
Understanding Merging Rules
There are two types of cases in case merging:
- Main case: A case which other cases will be merged into.
- Merged case: A case which is merged into a main case.
Agents need to know the following rules for merging cases.
| Stage | Rule |
| Before merging |
|
| After merging |
|
Merging Cases from a Case View

-
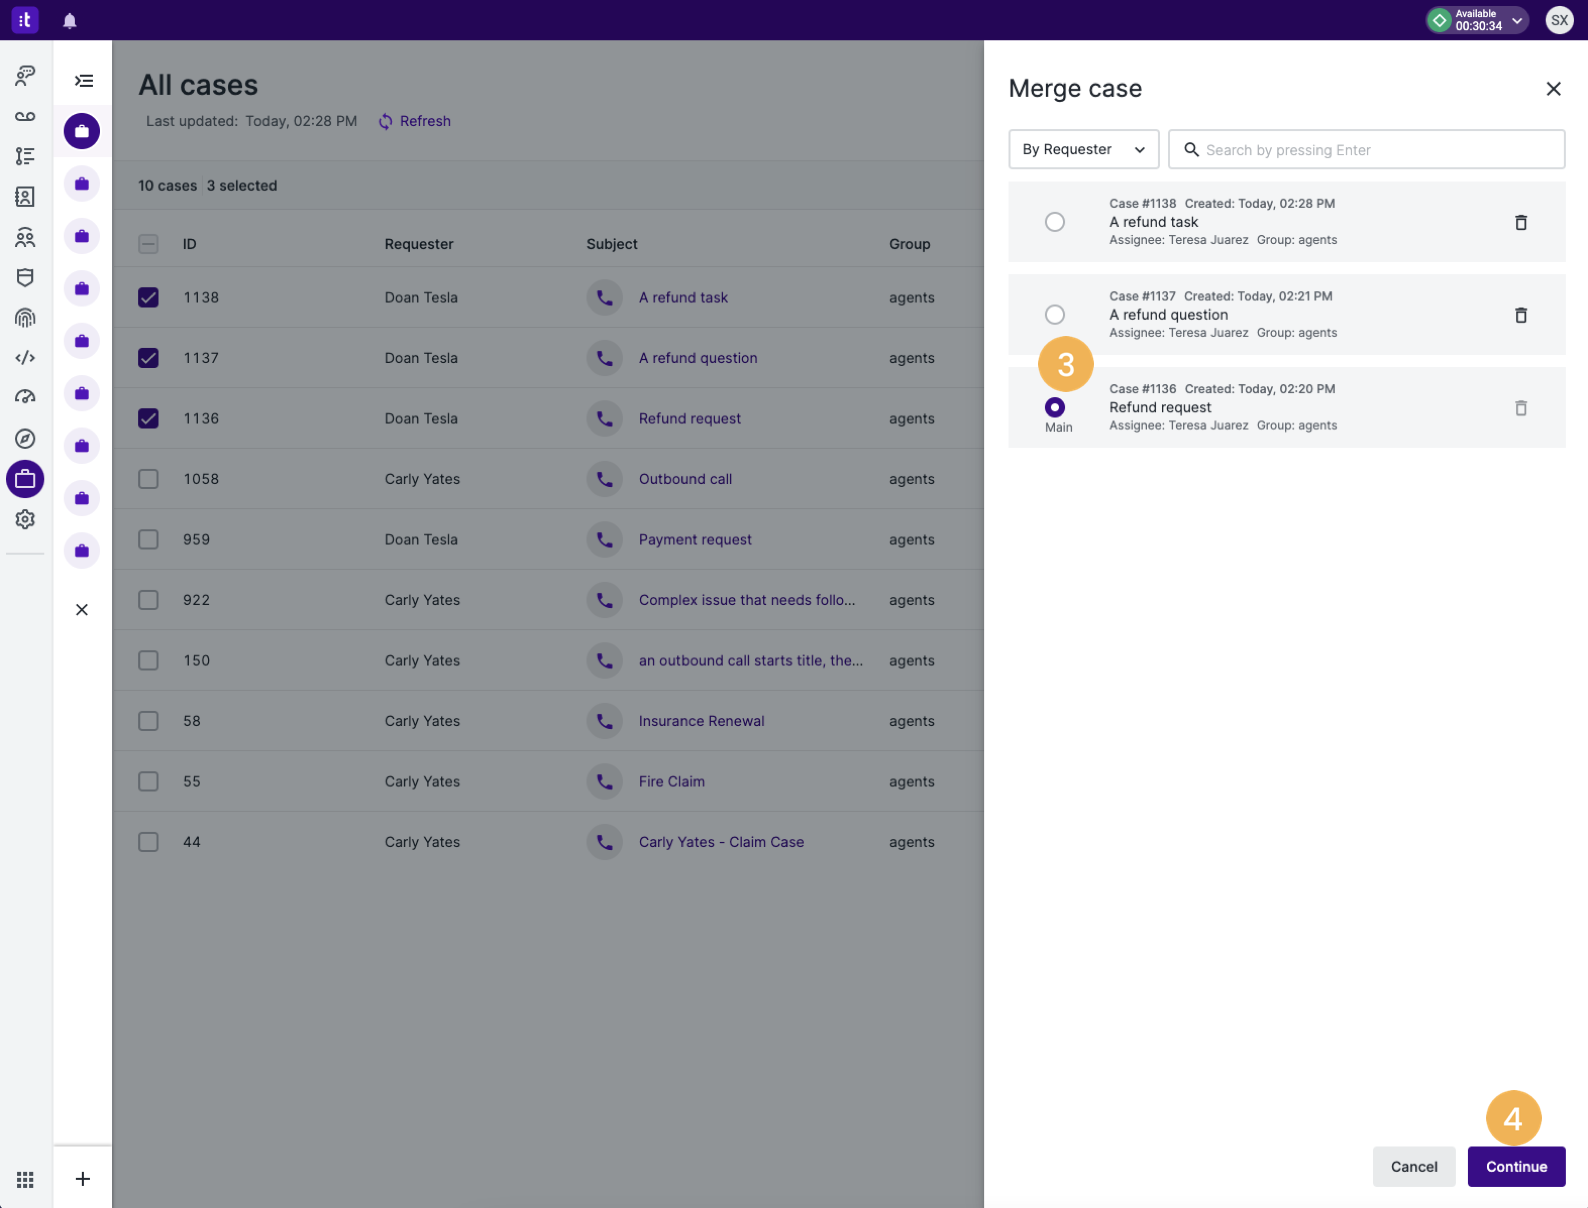
Go to a case view and select the checkboxes of cases [1] that you want to merge.
-
On the action bar, click Merge [2].
-
In the side panel that appears, set the main case by selecting the checkbox [3] of a case. You can add new cases to the list by using the search box. Enter a keyword into the search box, press Enter, and then check the cases that you want to add to the list. You can search for cases by Requester, Assignee, Subject, and ID. To remove a case from the list, click the trash can icon
 .
.Note: You cannot merge subcases, cases with unresolved subcases, and closed cases into a main case.
-
Click Continue [4].

-
Confirm the information of the main case and cases to be merged, and then click Merge [5]. Optionally, click the pencil icon
 to edit notes, which will appear in a “Case merge” card in the case card section on the case processing page.
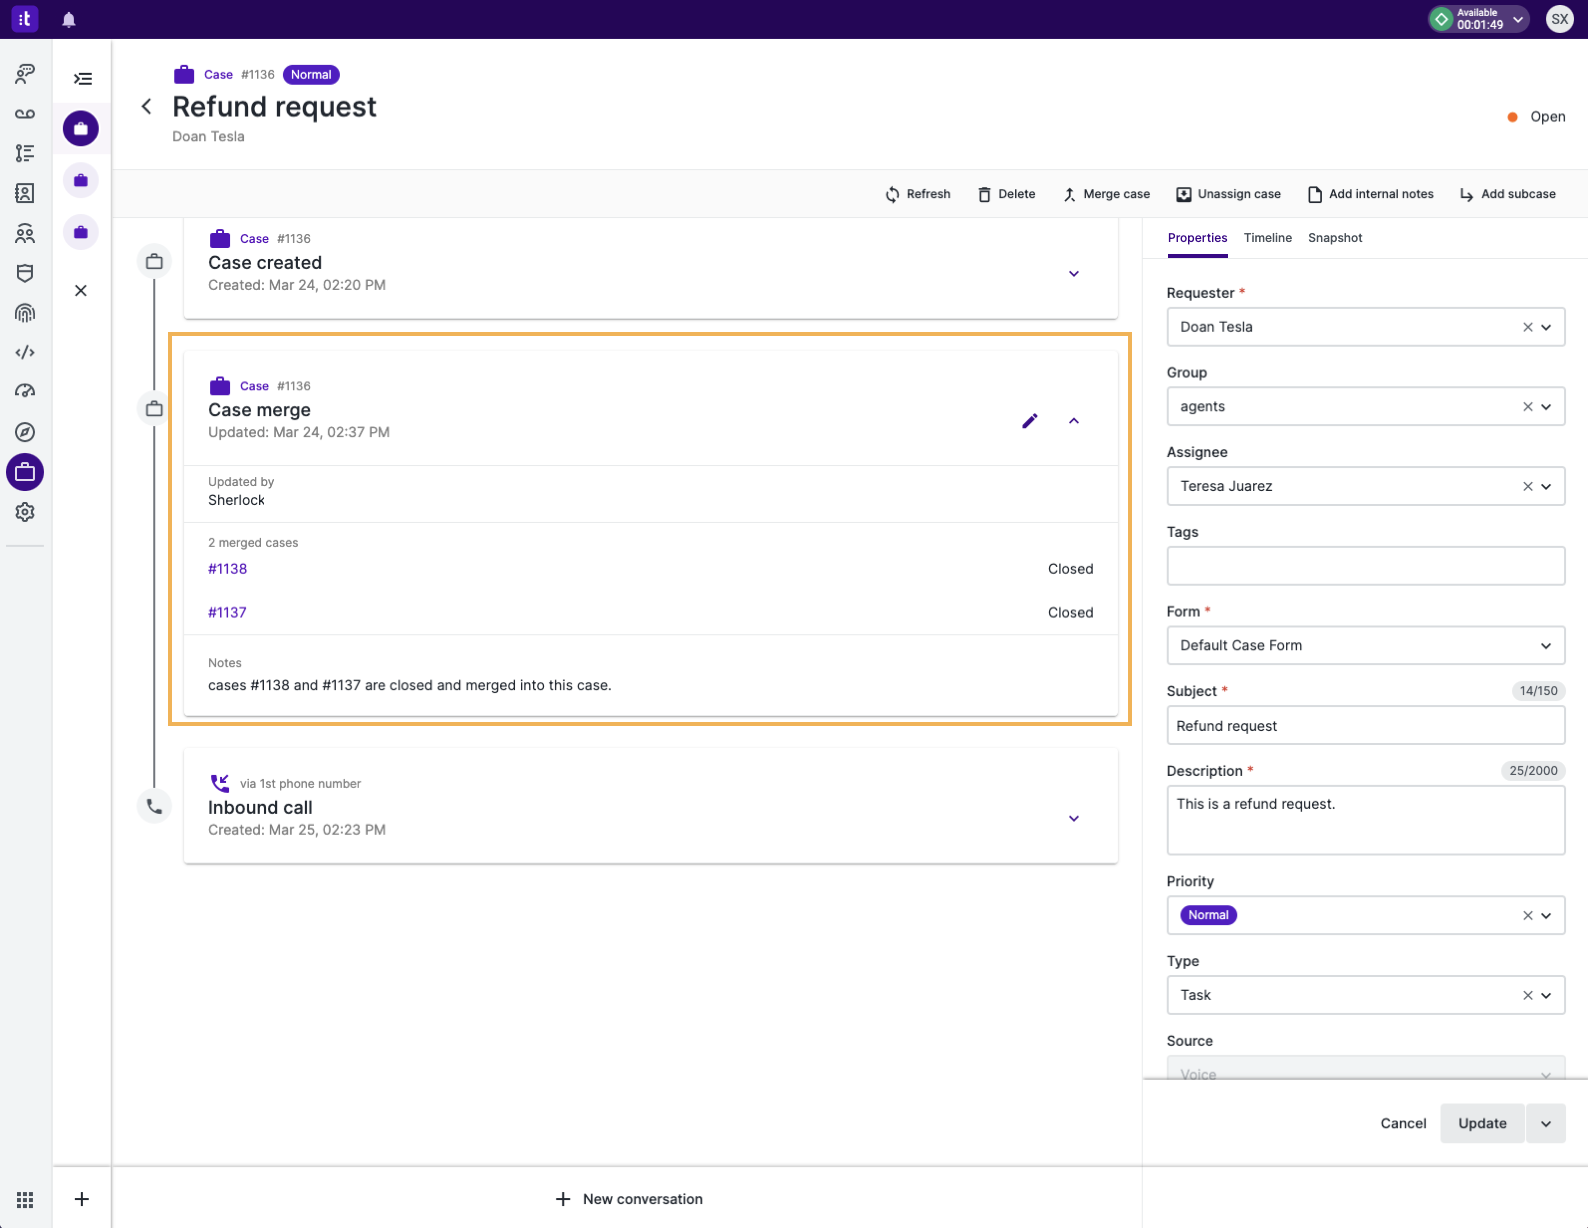
-
Merged cases are closed automatically. To go to a merged case, click its case ID in the “Case merge” card of the main case.
Merging Cases from the Case Processing Page
-
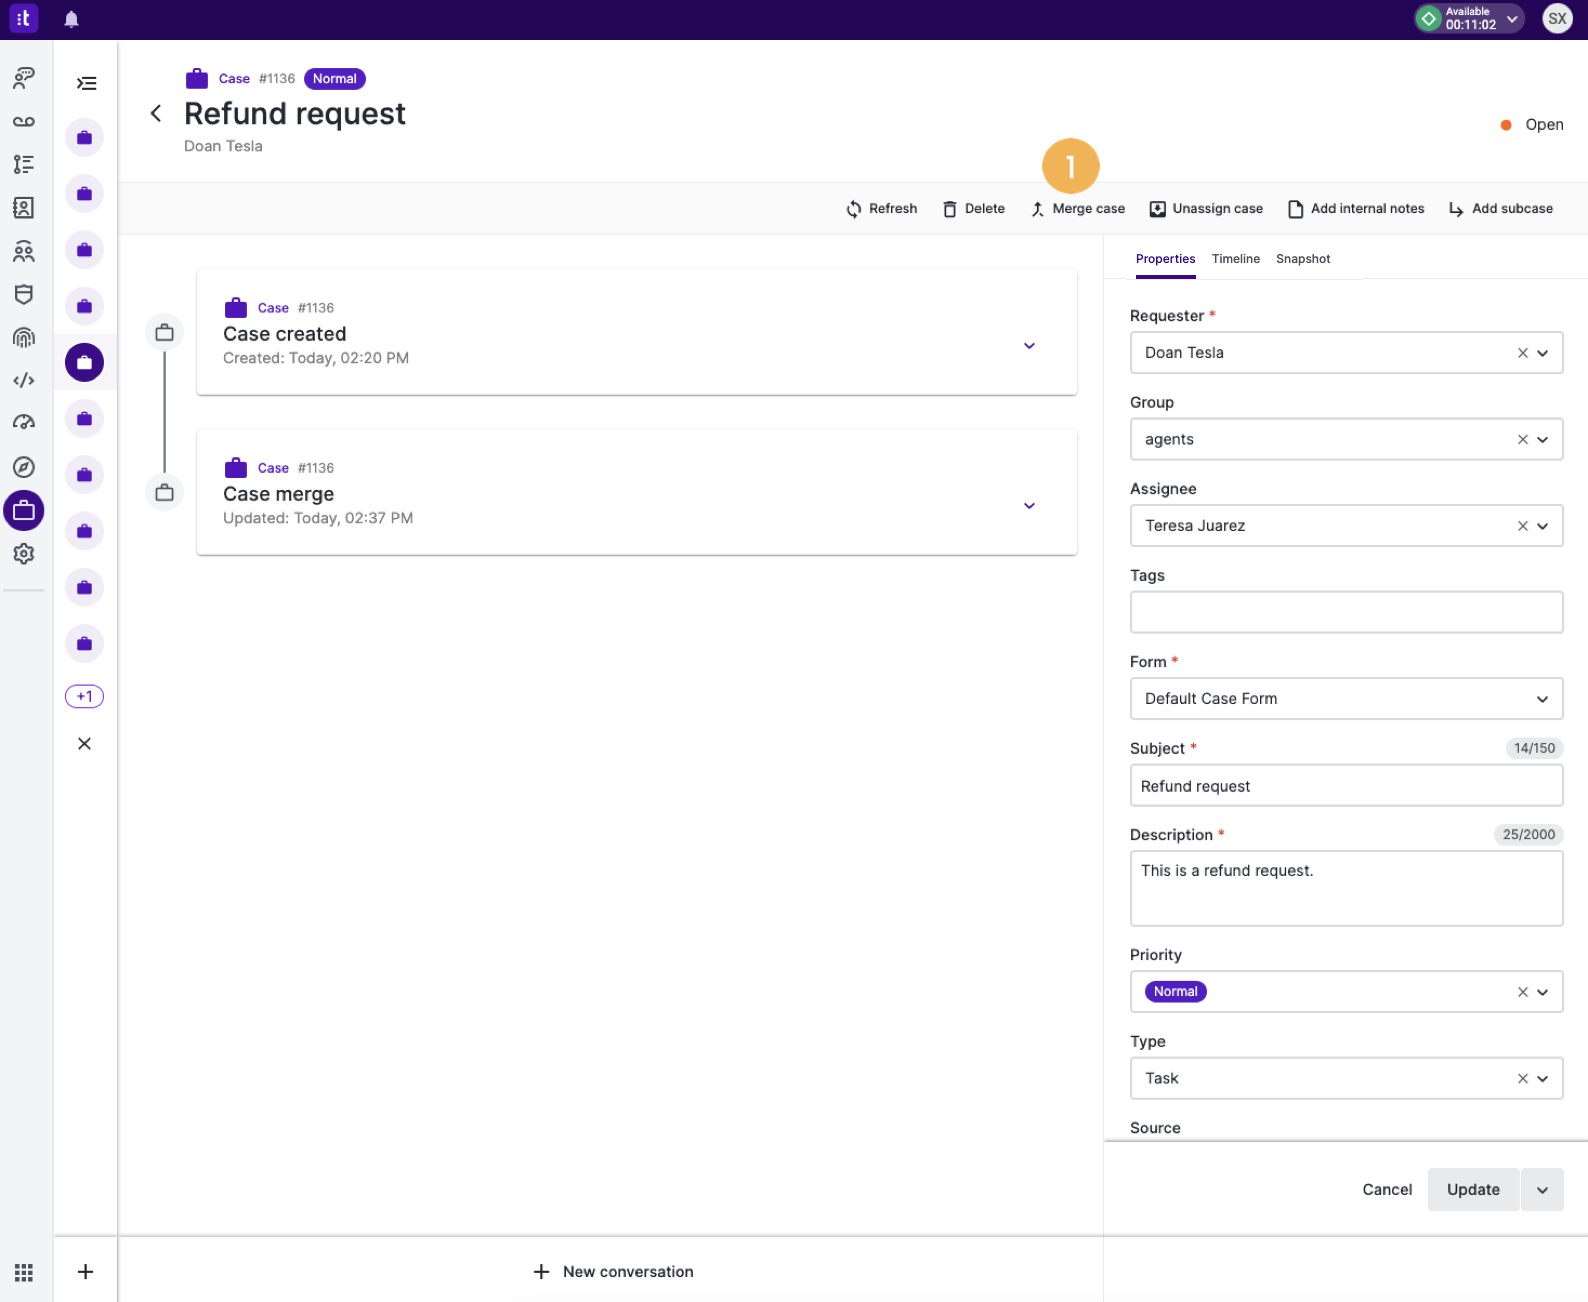
Go to a case view and click on a case. By default, this is the main case which others will be merged into. You can still change the main case later.
-
On the action bar, click Merge case [1]. This button is not available for subcases and closed cases.
-
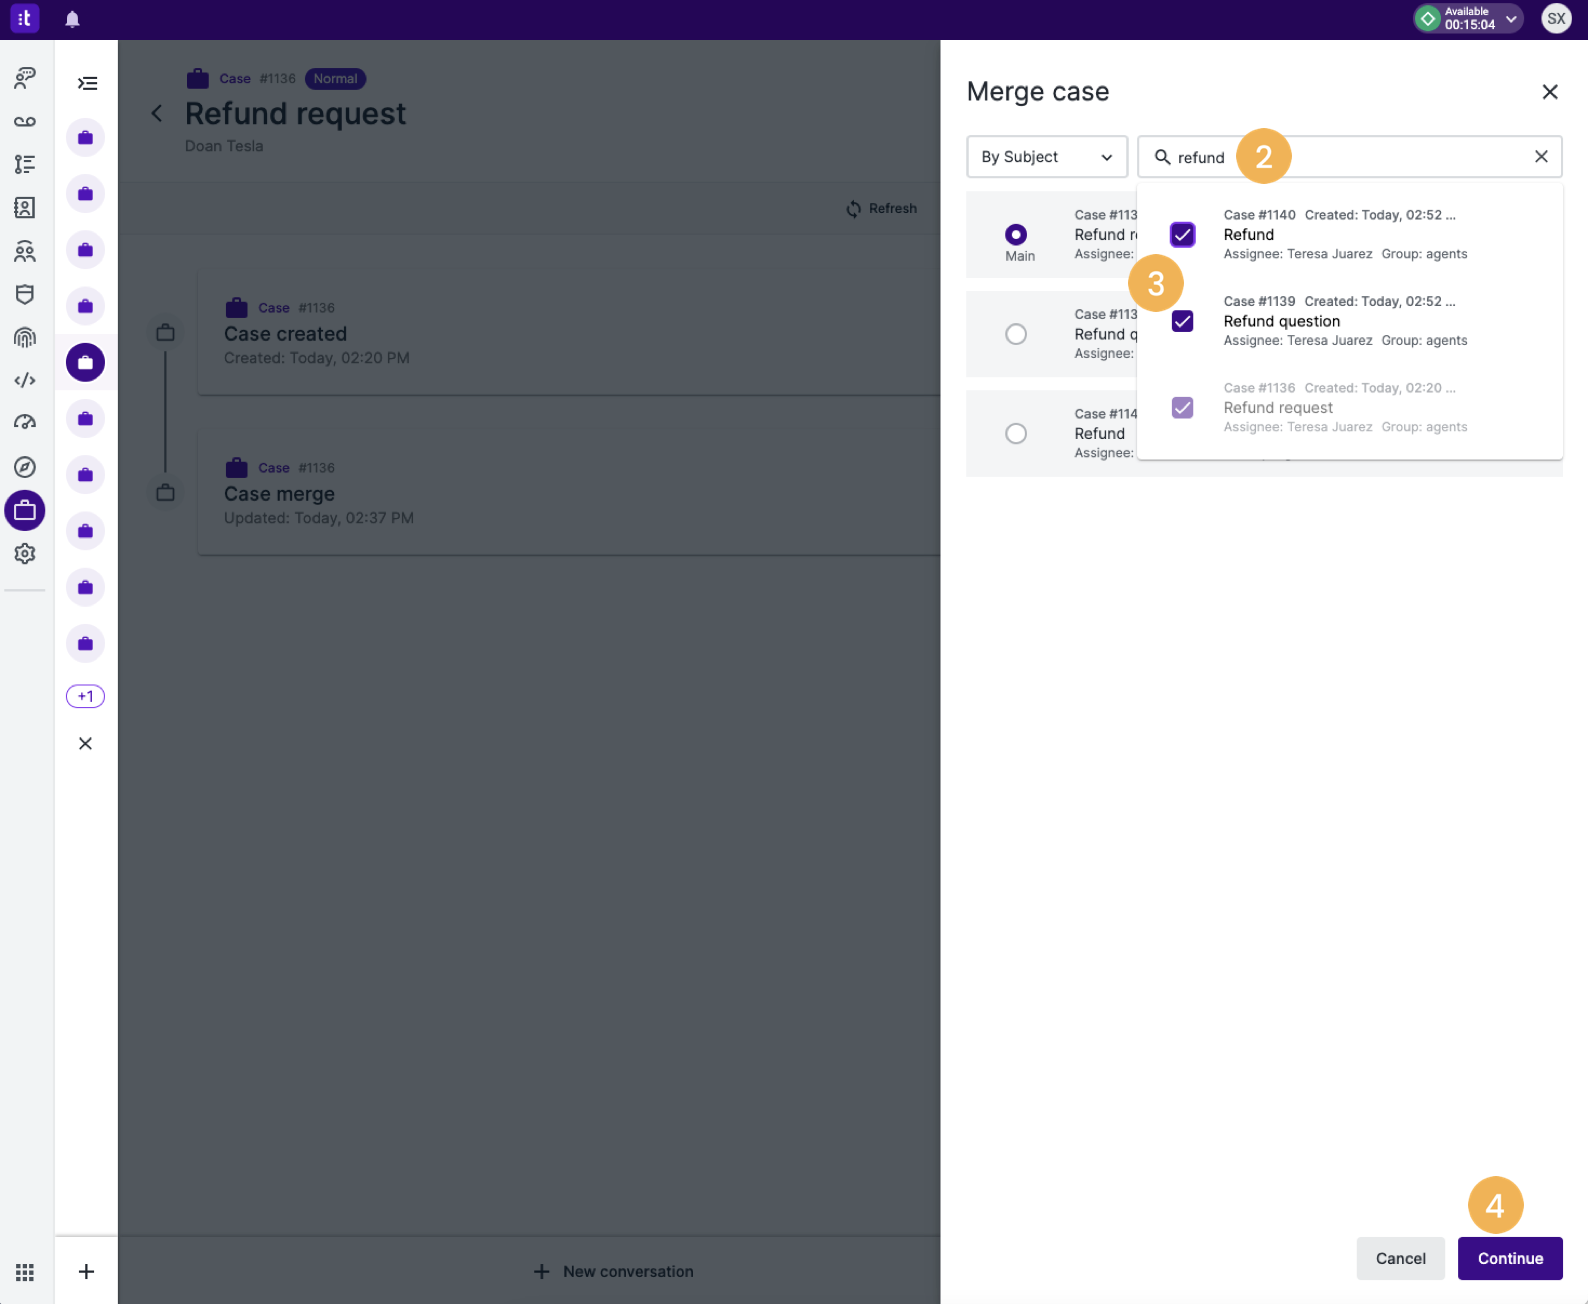
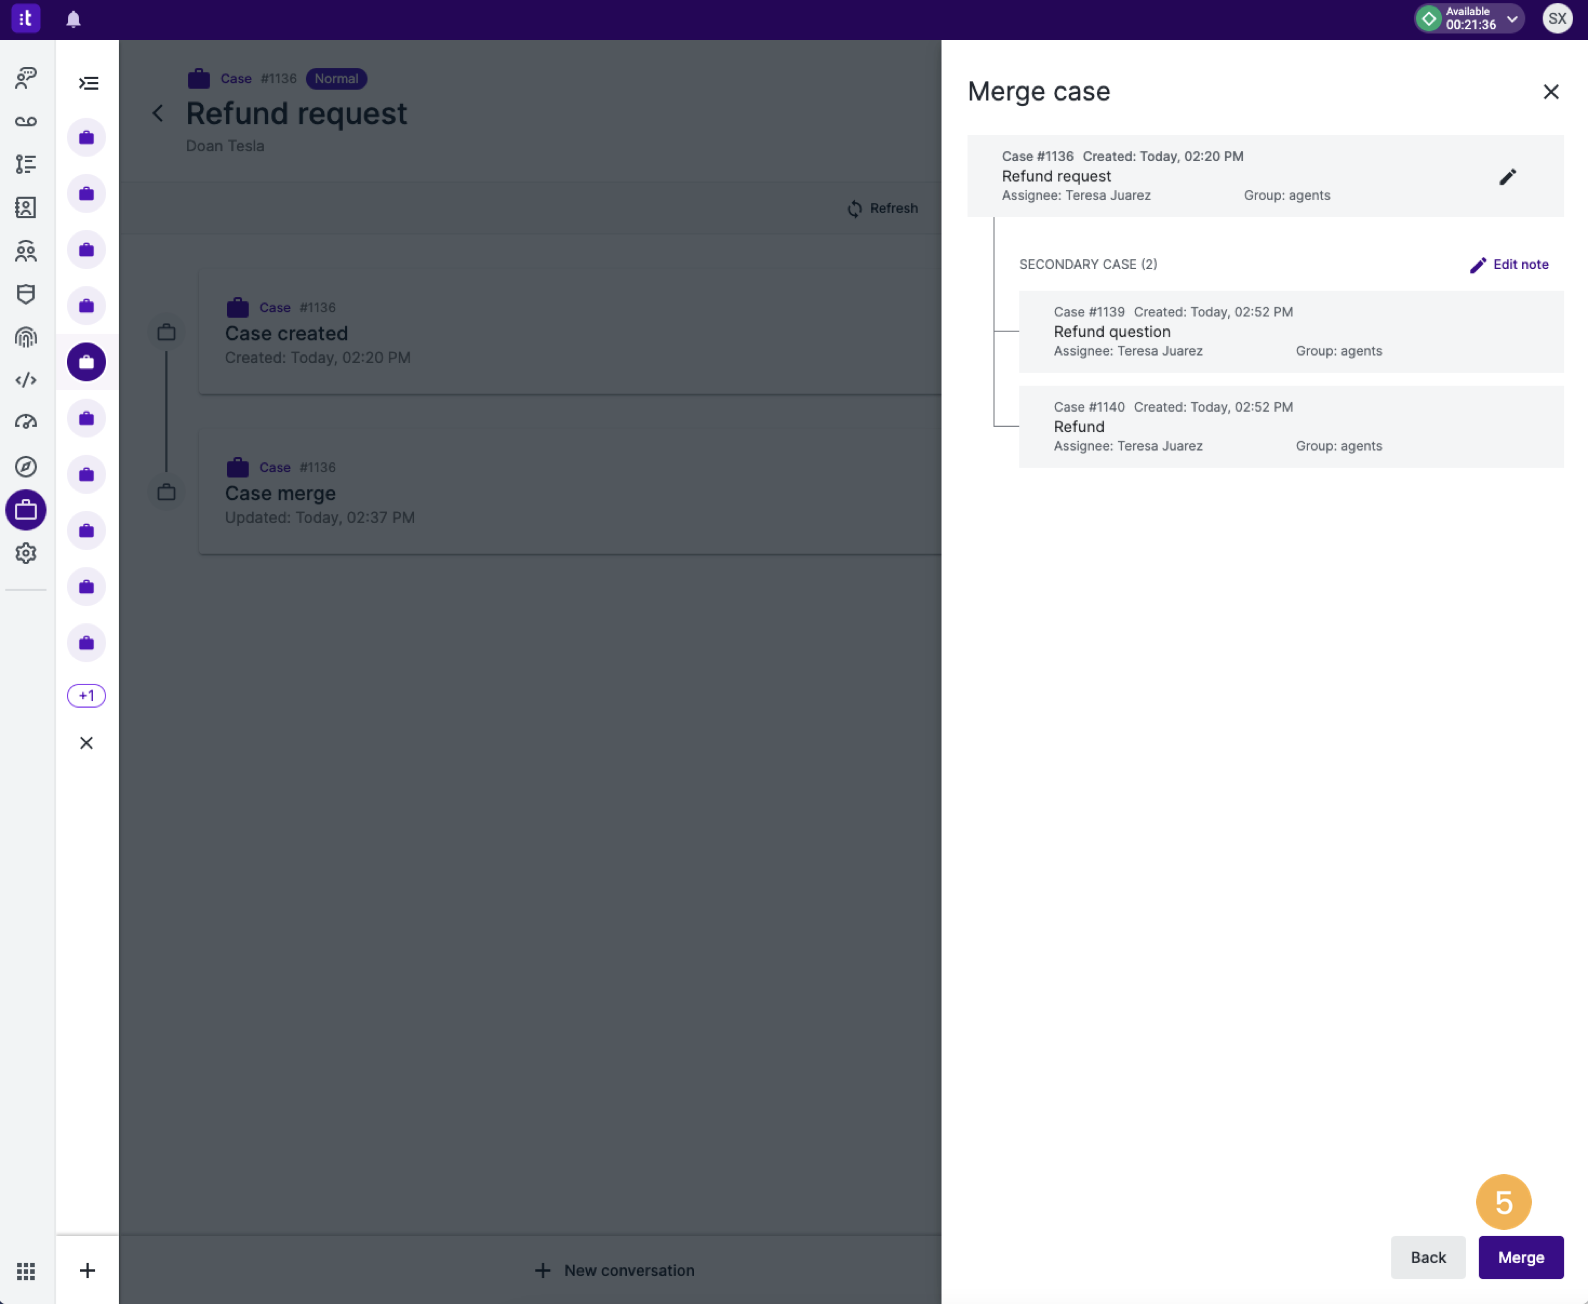
In the side panel that appears, enter a keyword into the search box [2], and then press “Enter”. You can search for cases by Requester, Assignee, Subject, and ID.
-
From the search results, check one or multiple cases to be merged into the main case [3]. You can change the main case by using the checkbox. To remove a case from the list, click the trash can icon
.Note: You cannot merge subcases, cases with unresolved subcases, and closed cases into a main case.
-
Click Continue [4].
-
Confirm the information of the main case and cases to be merged, and then click Merge [5]. Optionally, click the pencil icon
to edit notes, which will appear in a “Case merge” card in the case card section on the case processing page.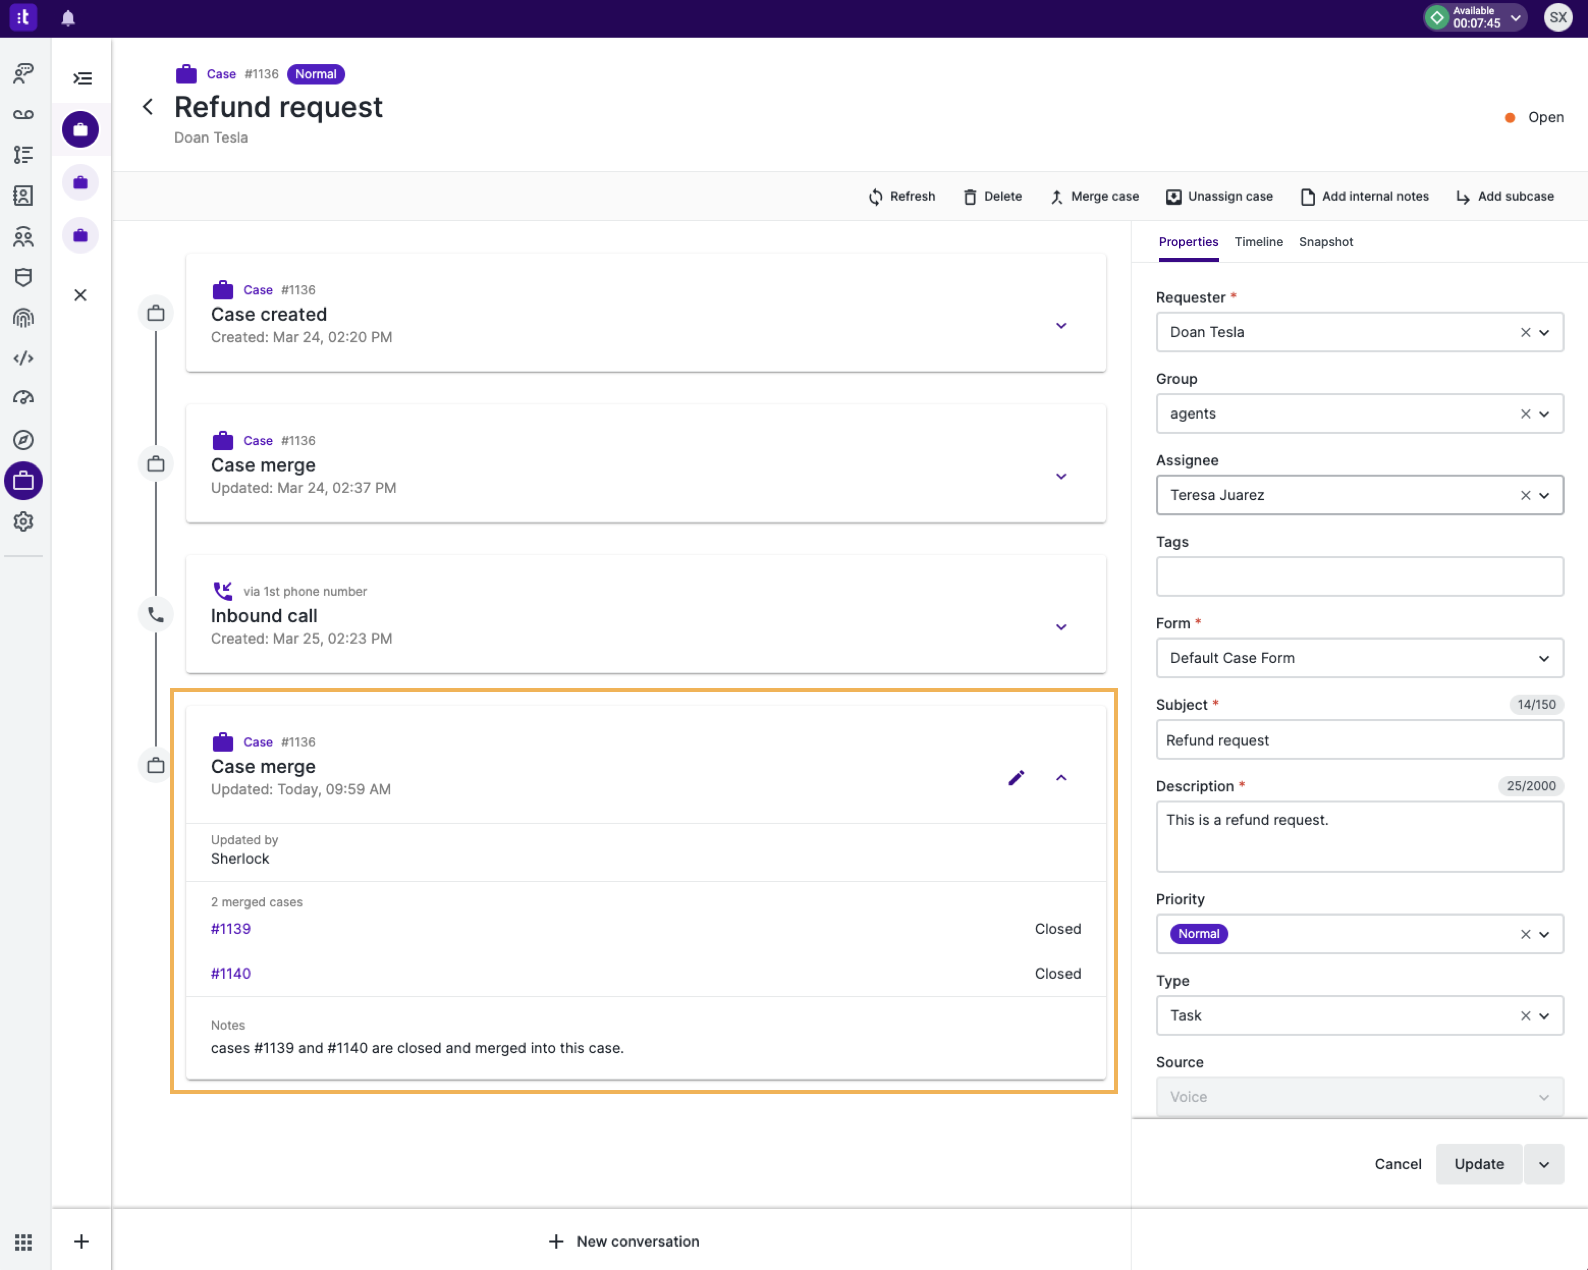
-
Merged cases are closed automatically. To go to a merged case, click its case ID in the “Case merge” card of the main case.