The Identity tab is bundled into Conversations, inside Talkdesk Workspace™, and appears automatically to agents during inbound calls.
Now, your agents can see real-time information regarding the callers’ authentication with voice biometrics, and fraud-related insights concerning the caller’s phone number.
Viewing the Identity tab
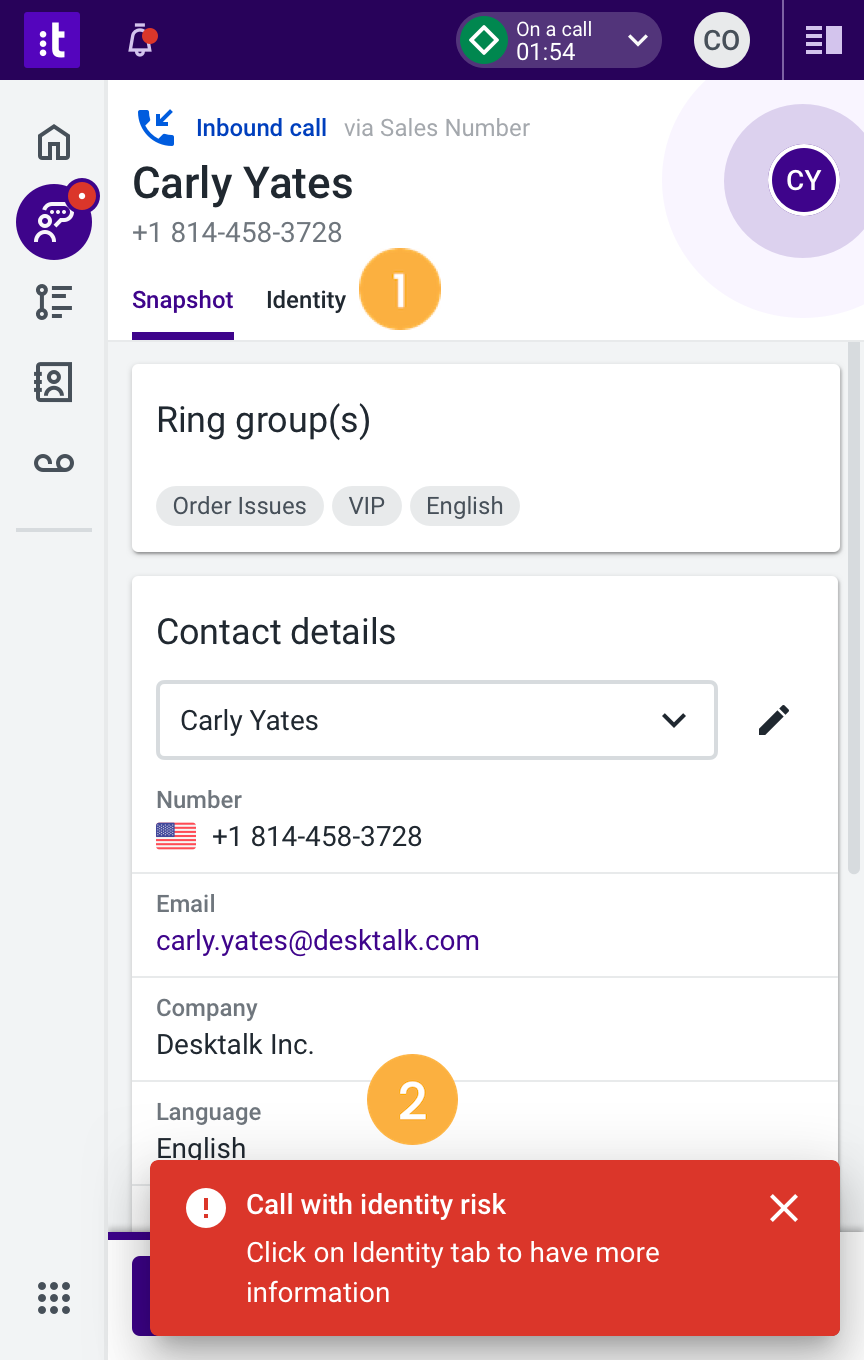
When an agent receives an inbound call, the Identity tab [1] appears in Conversations.
If the call poses any risk, your agent will see a warning message in the bottom right corner of the screen: "Call with Identity risk" [2].
Caller not enrolled in Voice authentication
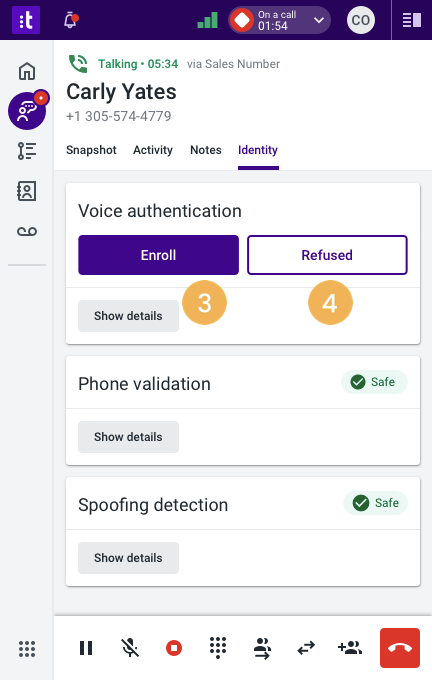
If a caller is not enrolled in the voice biometrics system, your agent will see the Enroll [3] and Refused [4] buttons.
Note: In order to enroll a phone number, please make sure you set up the required components as per this article.
Firstly, your agent will have to perform the authentication questions and collect the caller’s consent. Afterward, by clicking on the Enroll button, the system starts the enrollment process.
Depending on what type of authentication was configured - active or passive authentication - the enrollment will start immediately, during the call or when the agent hangs up (meaning the caller stays online and completes the operation).
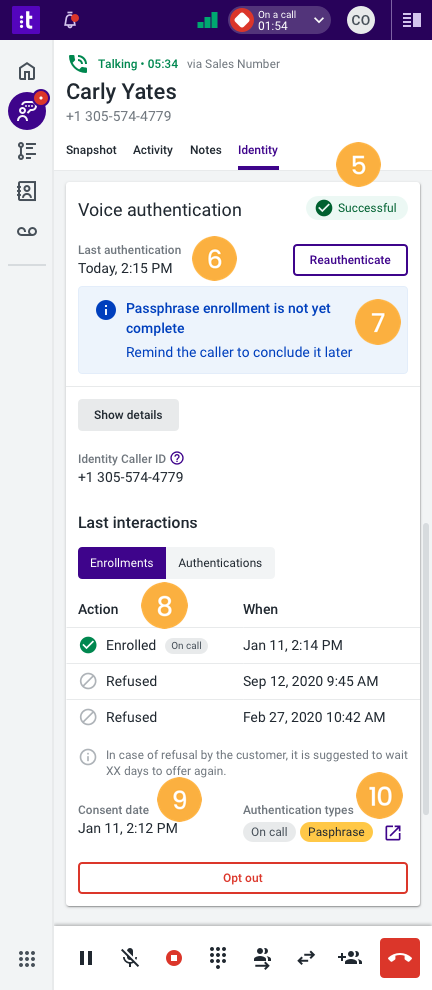
If passive authentication was configured, immediately after the enrollment is completed, an authentication is performed and the result [5] is presented to the agent, as well as when [6] it happened.
In case active authentication is also set up, the agent will see a message informing that the active authentication, a.k.a “Passphrase” is still pending [7], and can inform the caller that they need to stay on the line to complete the enrollment.
By clicking on the Show details link, the agent can verify when the enrollment was done [8], when the consent was given [9], and if any enrollment is pending [10].
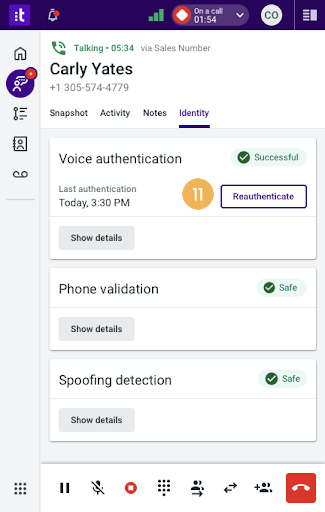
The agent can at any time during the call Reauthenticate the caller [11] within seconds, and the agent will see the result and the date and time of when it was completed.
If the caller didn’t give consent to use voice biometrics, when the agent hangs up the call will follow the pre-configured call path. In case the customer outright said they refused, the agent will click on Refused. The refusal will be kept in the caller’s interactions list, and, when the agent hangs up, the call will follow its pre-defined flow.
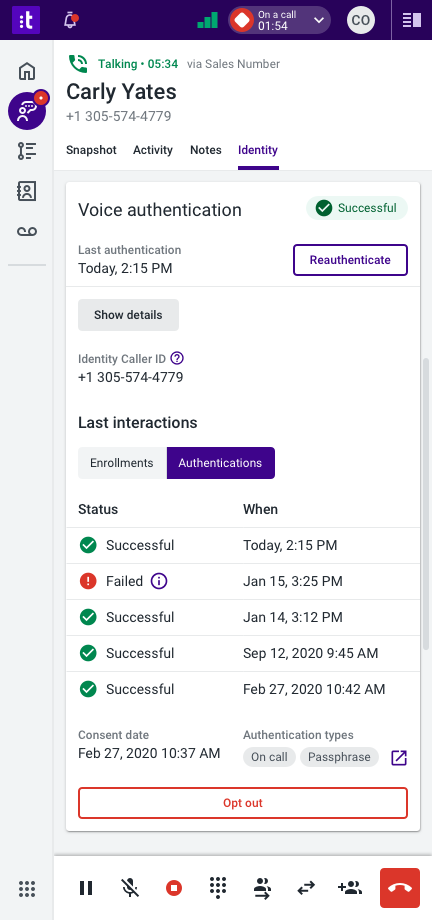
The agent can see a list of the “Last interactions” the caller had in previous calls by clicking on the Show details link.
This also shows the Identity Caller ID, which is either the caller’s phone number or another identifier that was requested by an INPUT IVR when the call was initiated. This number can be an Account Number, a Driver’s license number, or another identifier that your agent will recognize. This number combined with the voice sample collected during the enrollment process is called the voiceprint, and it is used to compare against each time the caller authenticates.
The “Last Interactions” list includes two options:
- Enrollments - where the agent can verify the previous five enrollment-related actions performed, including also any Refusals or Cancellations.
- Authorizations - where the agent can validate the last 5 authentication attempts and their status.
In case of a failure during either enrollment or authentication, those are clearly marked, and the agent can see the reason why the failure occurred.
Caller authentication status
If the authentication is successful, the agent will see a “Successful” authentication status.
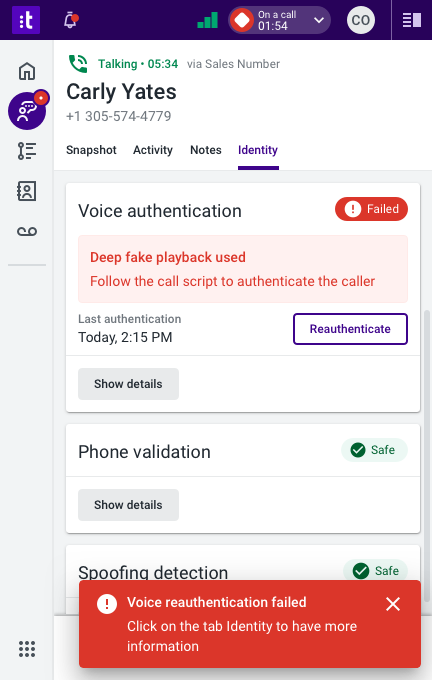
If not, the agent will see a “Failed” authentication status, and is recommended to follow the call script pre-defined for these cases.
Caller right to be forgotten

In order to follow up on the caller’s request for the right to be forgotten (RTBF) from voice biometrics, your agent needs to click on the Opt out button.
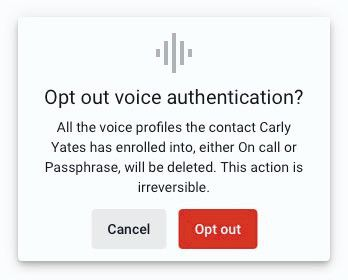
After confirming the Opt out option, the caller’s voice data will be deleted.
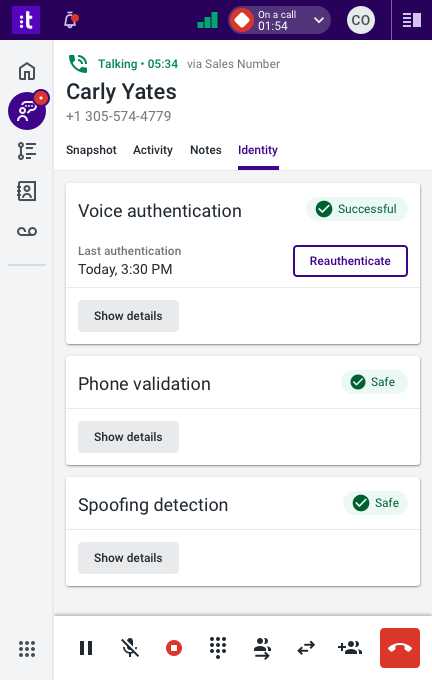
Spoofing Detection
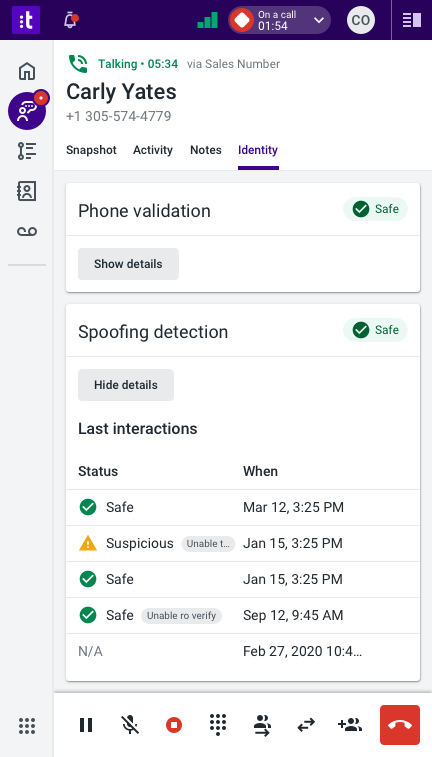
The “Spoofing detection” section indicates potential scammers by warning when the caller may not be the one that is displayed in the caller ID.
The spoofing detection mechanism we are using is the SHAKEN/STIR, where the voice service provider includes a digital classification for calls that categorizes the essential information about the caller into levels of attestation for the call. These attestation levels characterize a caller’s right to use a particular phone number.
The spoofing detection status is displayed on top:
- “High risk”: The initiating service provider has authenticated that it placed the call on its network, but has no relationship with the caller.
- “Suspicious”: The carrier can authenticate its relationship with the calling customers, but cannot verify if the consumer is authorized to use the number
- “Safe”: The service provider has fully authenticated that the customer initiating the call is authorized to use the calling number
Your agent can see how the previous calls were classified by clicking on the Show details button.
Phone Validation information
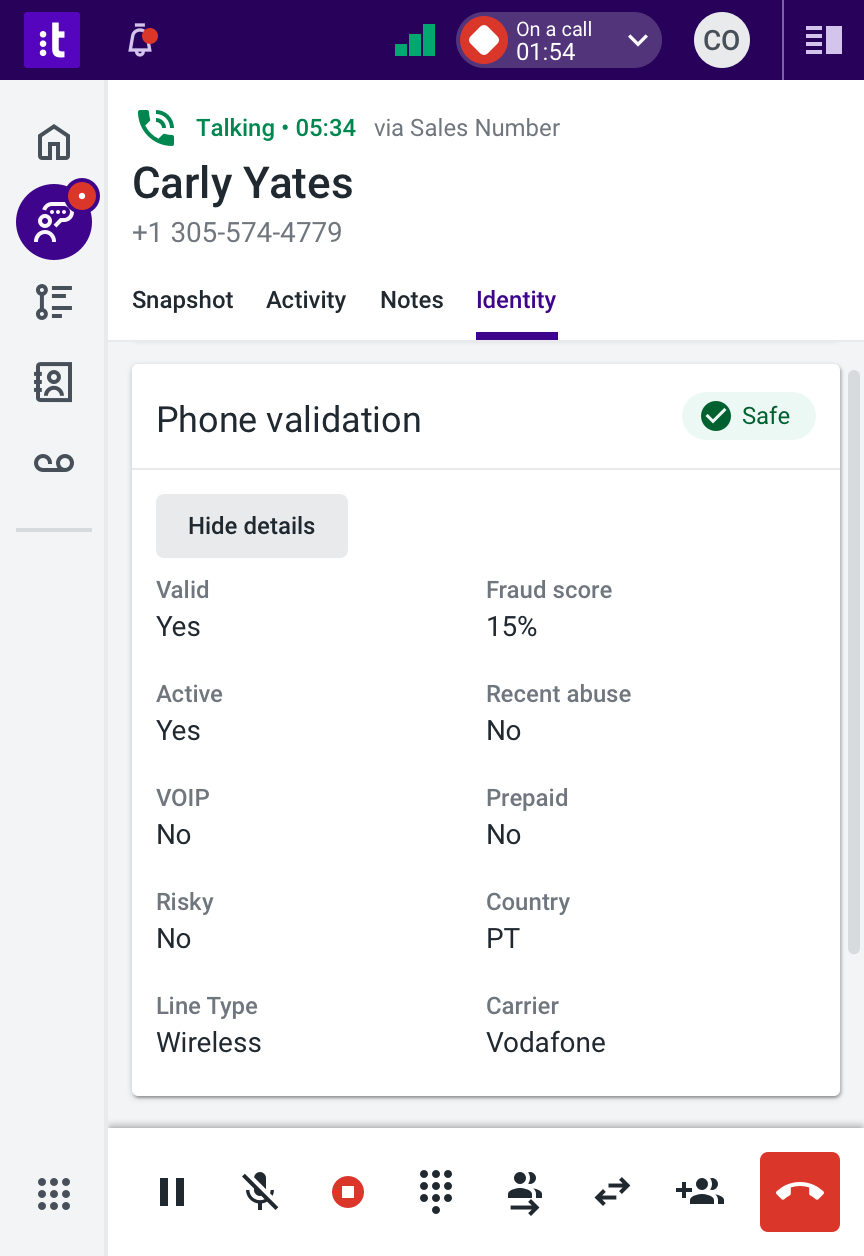
The “Phone validation” section presents the background check that was performed automatically on the caller’s phone number.
The phone validation fraud score is displayed on top:
- “High-risk”: Fraud scores >=85% are high-risk users that are likely to engage in malicious behavior. Scores in this threshold indicate recent or excessive abuse and fit the profile of a typical risky user.
- “Suspicious”: Fraud scores >= 75% are suspicious and are likely to be involved in suspicious or dangerous activities, but not necessarily a fraudulent user.
- “Safe”: Fraud scores < 75% are considered safe.
Your agent can see the detailed insights by clicking on the Show details button.